Connect your survey or CX platforms directly to Caplena to import feedback automatically. These integrations use authenticated API access to pull new responses daily, so you can analyze open-ended feedback without manual exports.Documentation Index
Fetch the complete documentation index at: https://docs.caplena.com/llms.txt
Use this file to discover all available pages before exploring further.
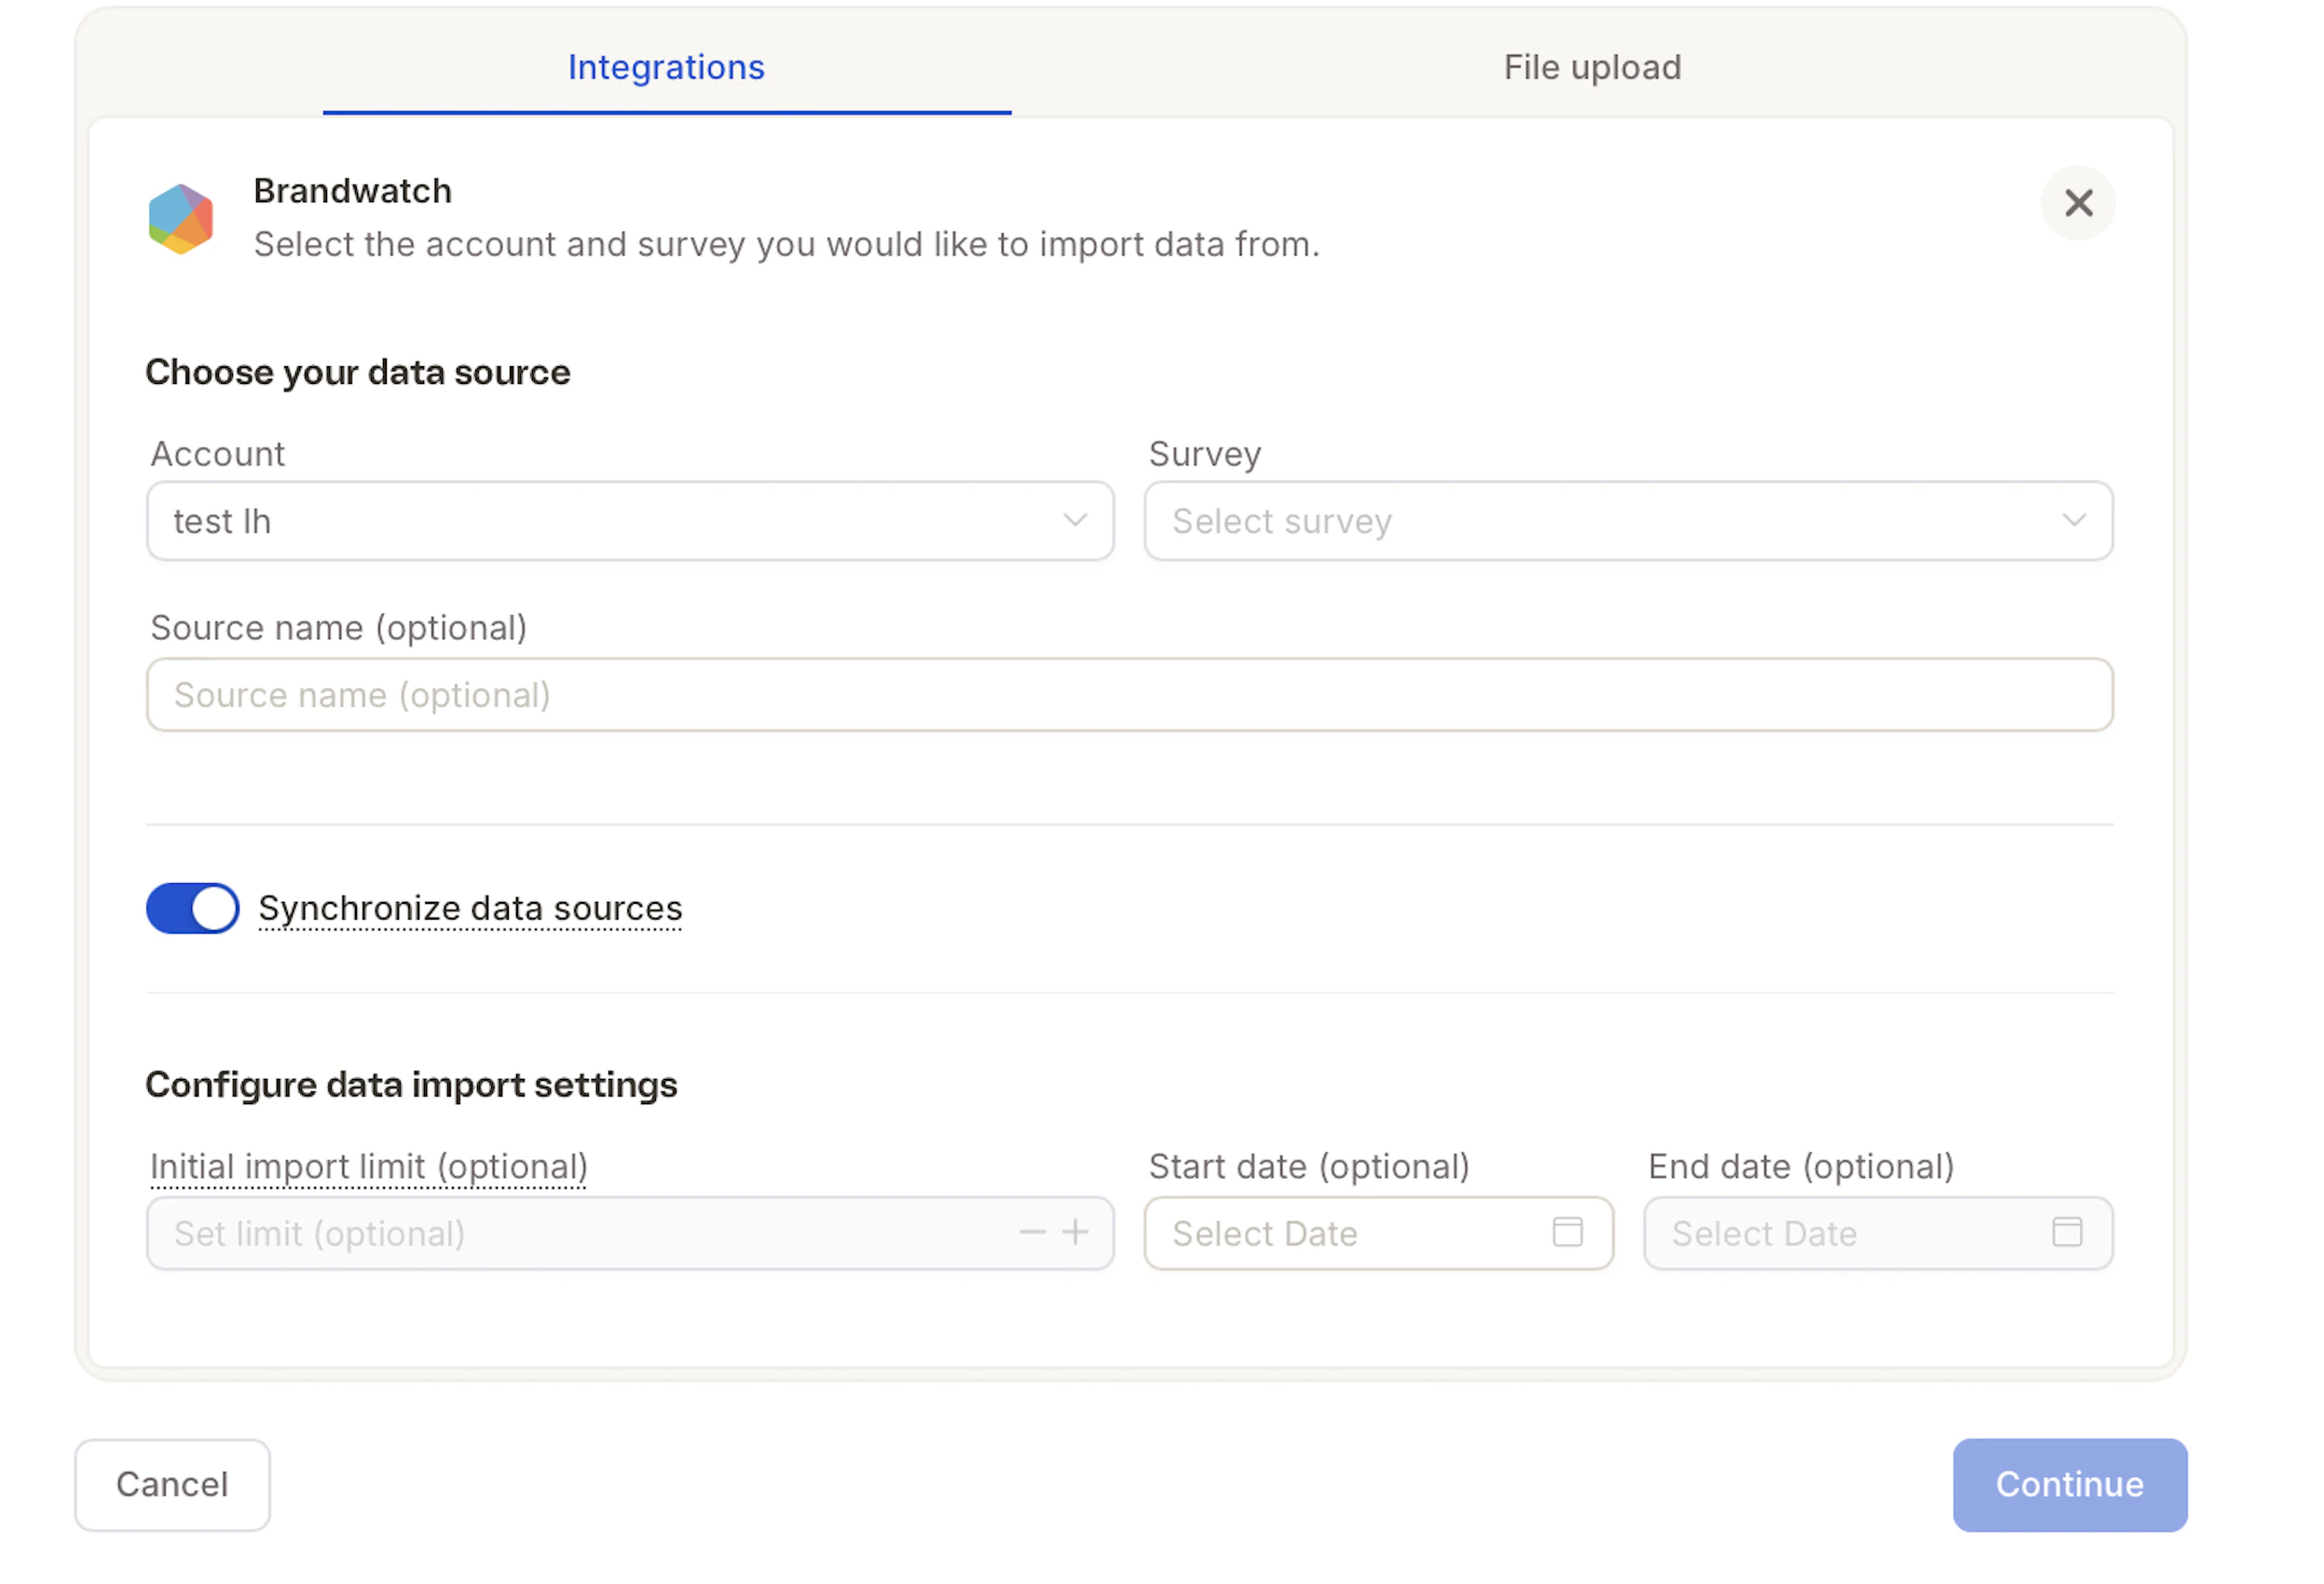
Brandwatch
Our Brandwatch integration allows you to seamlessly import social media query results directly into Caplena for analysis.Open Integrations Settings
Log in to your Caplena account. Navigate to Account Settings → Integrations. Select Brandwatch from the available options.
Here you can find more info on the Settings page
Add Your Brandwatch Account
Click Add Account and fill in the following fields: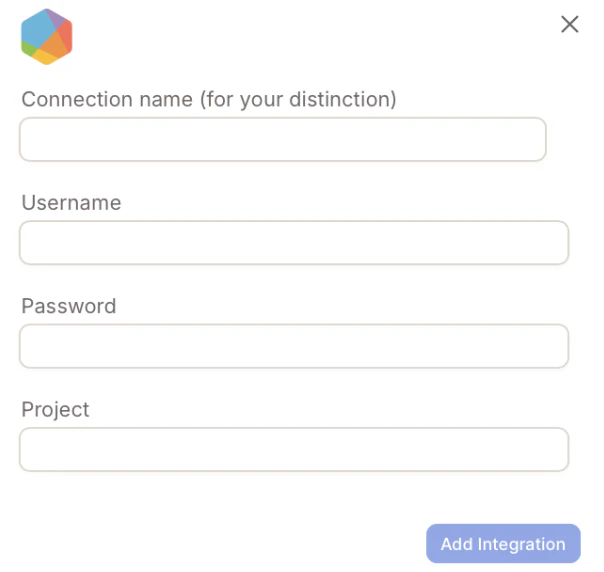
- Connection name – Give your connection a unique name
- Username – Your Brandwatch username
- Password – Your Brandwatch password
- Project name – You can find this in your Brandwatch account
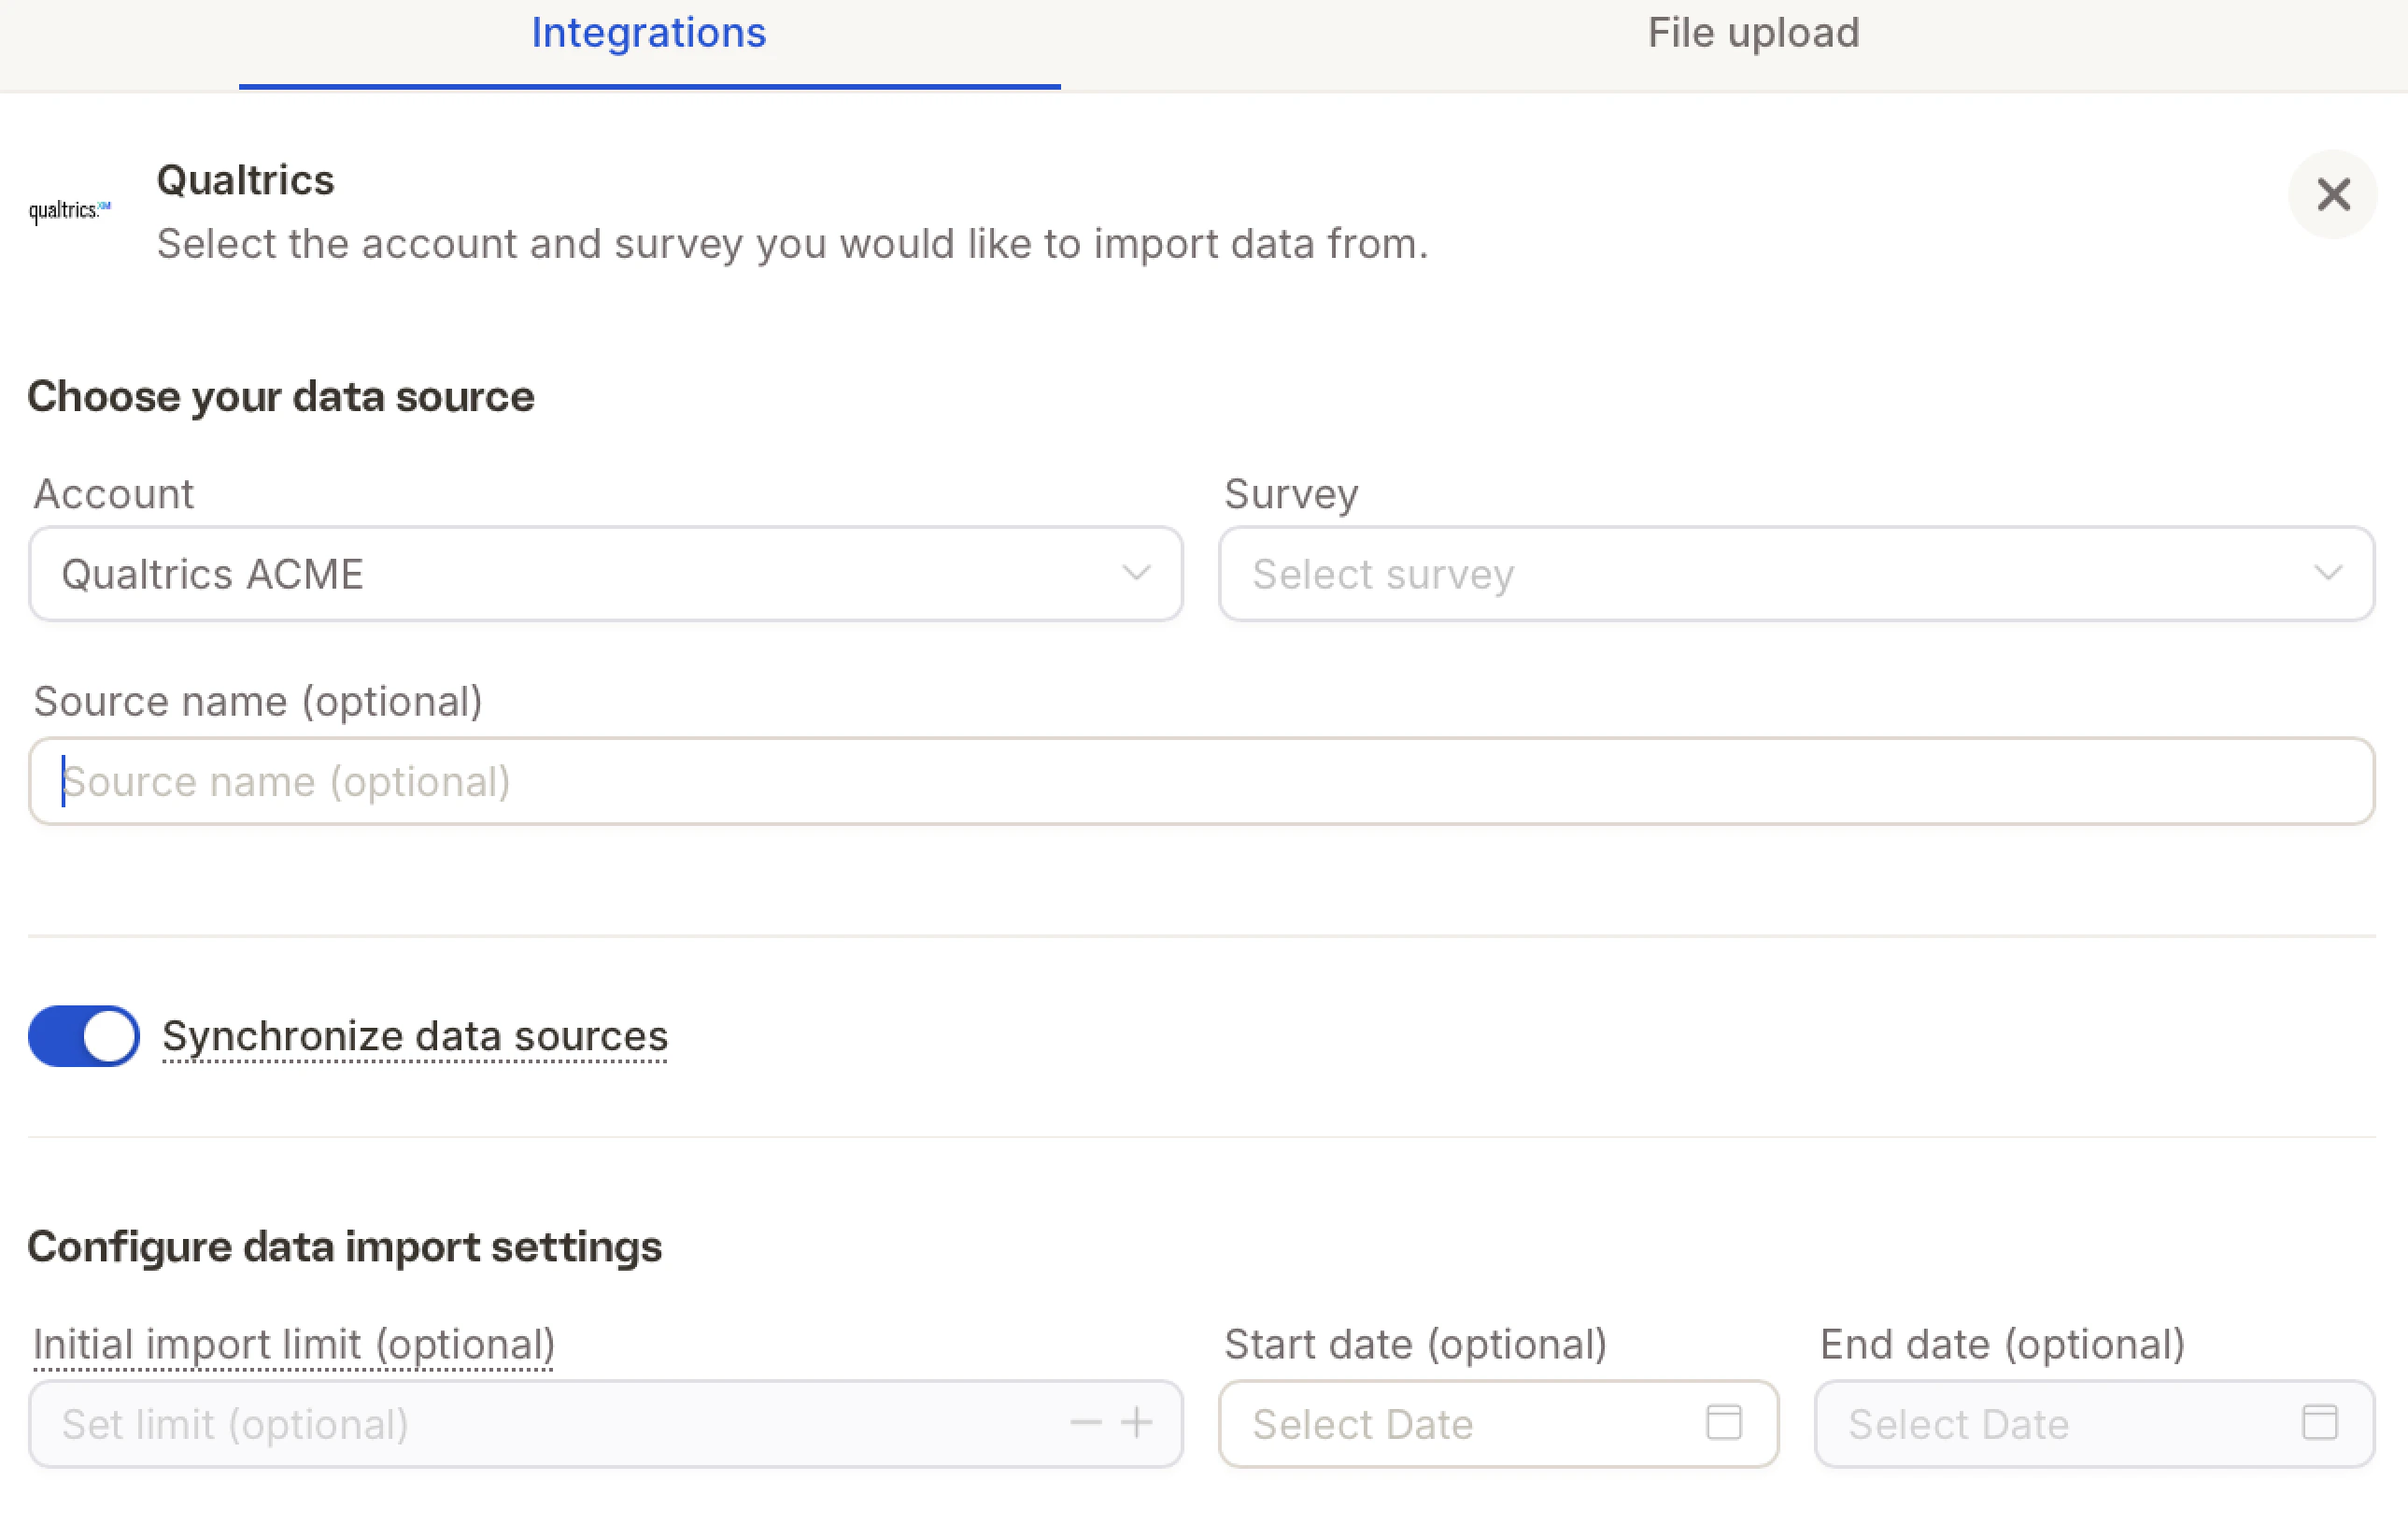
Qualtrics
Access Integration Settings
Log in to your Caplena account. Navigate to Account Settings → Integrations → Qualtrics.
Here you can find more info on the Settings page
Set Up OAuth in Qualtrics
Create an OAuth client in Qualtrics following the official guide. You’ll receive a Client ID and Client Secret. Required scopes:
read:users, read:surveys, read:survey_responses.Fill in Connection Details
Click Add Account and complete: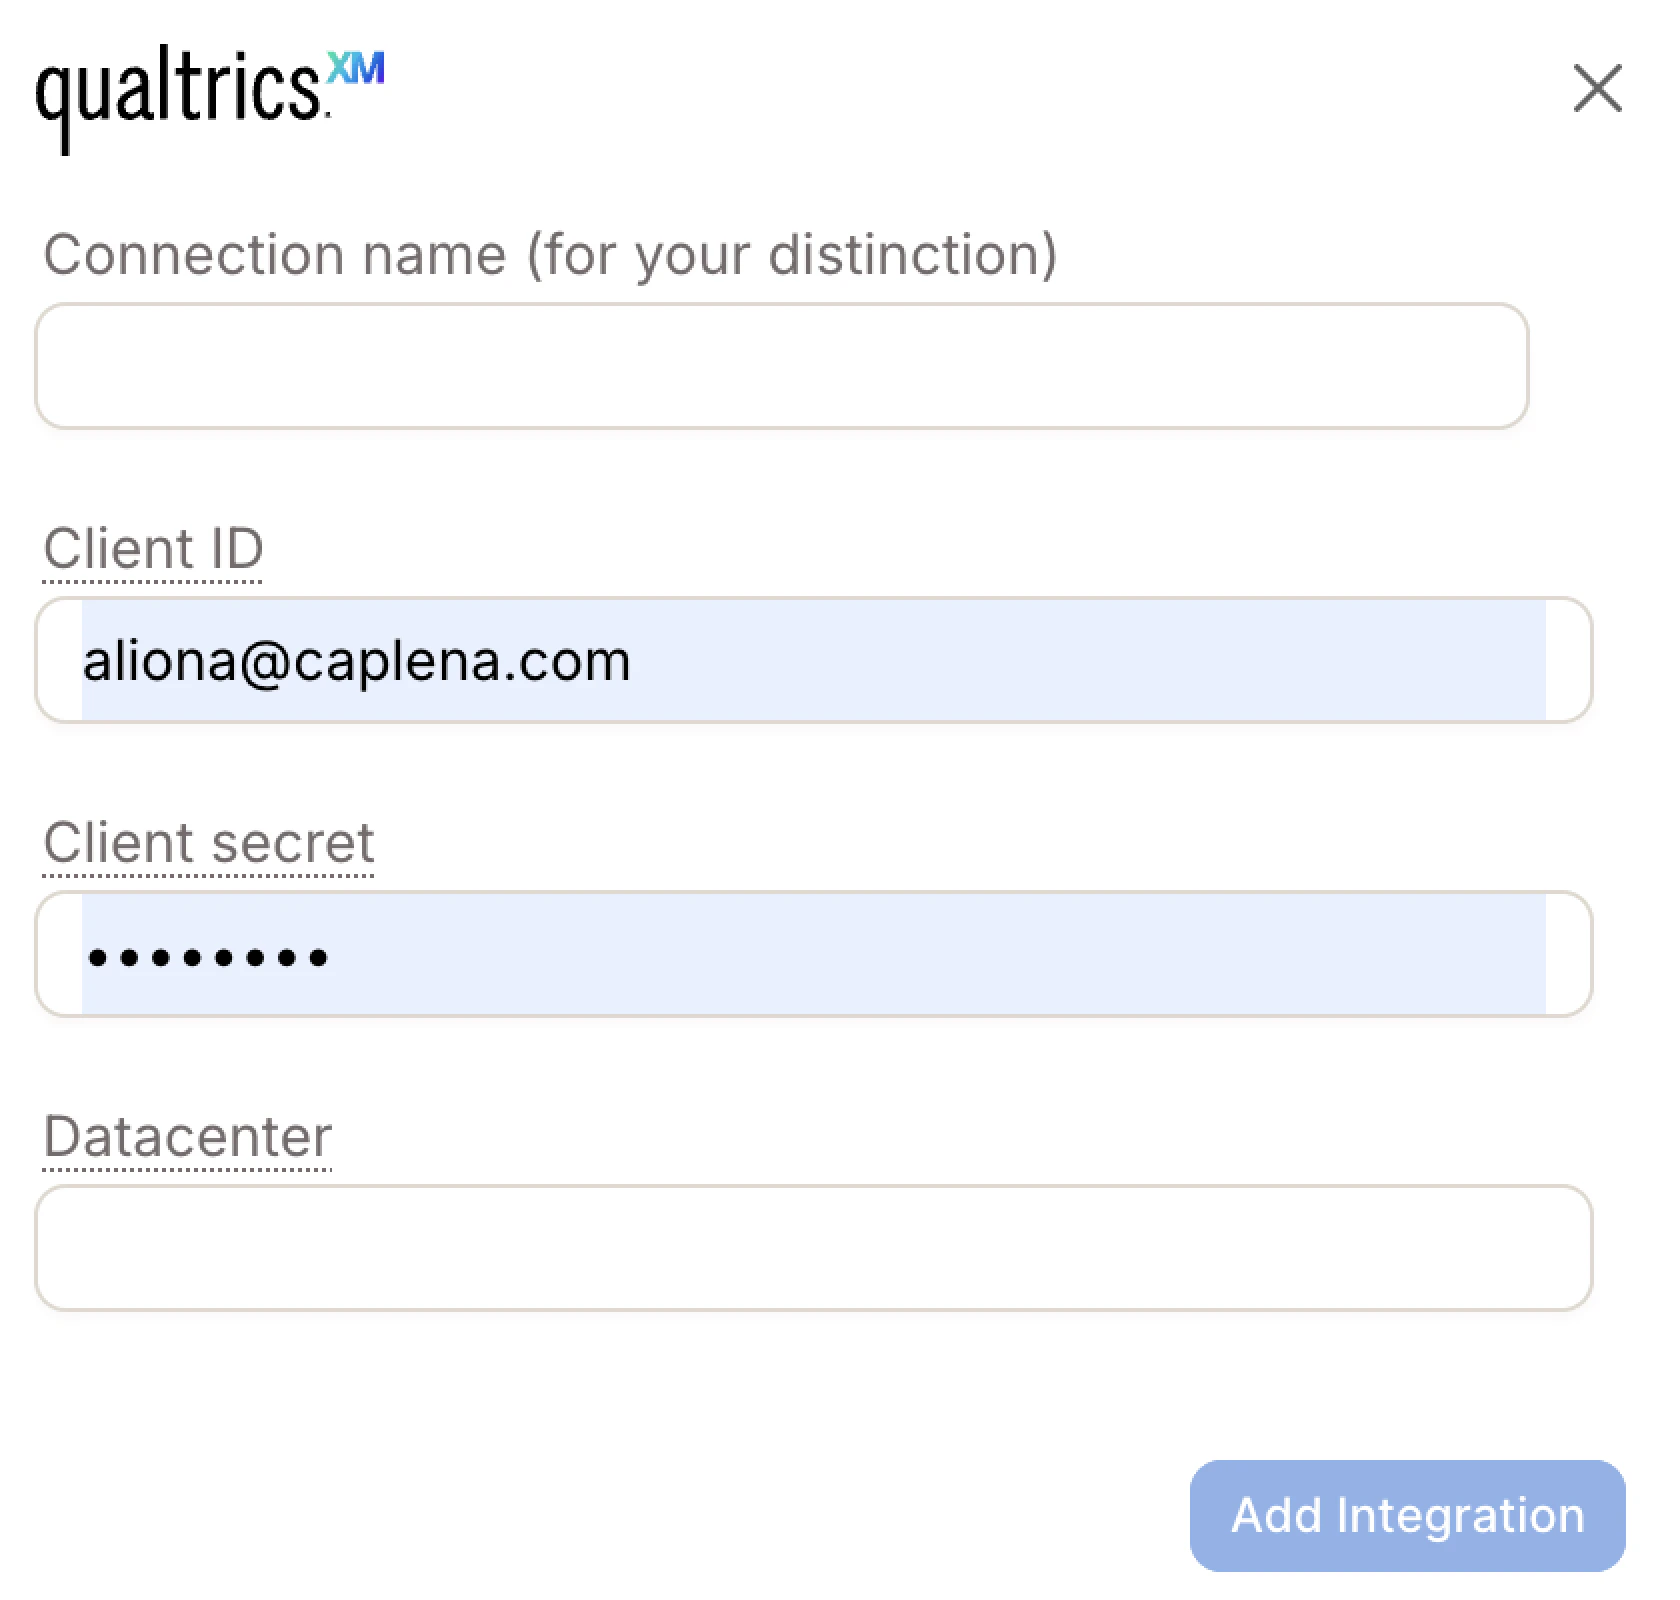
- Connection Name – A custom label (e.g. “Client A – Q Feedback”)
- Client ID – From your Qualtrics OAuth setup
- Client Secret – From your Qualtrics OAuth setup
- Datacenter – Found in Account Settings → Qualtrics IDs → User
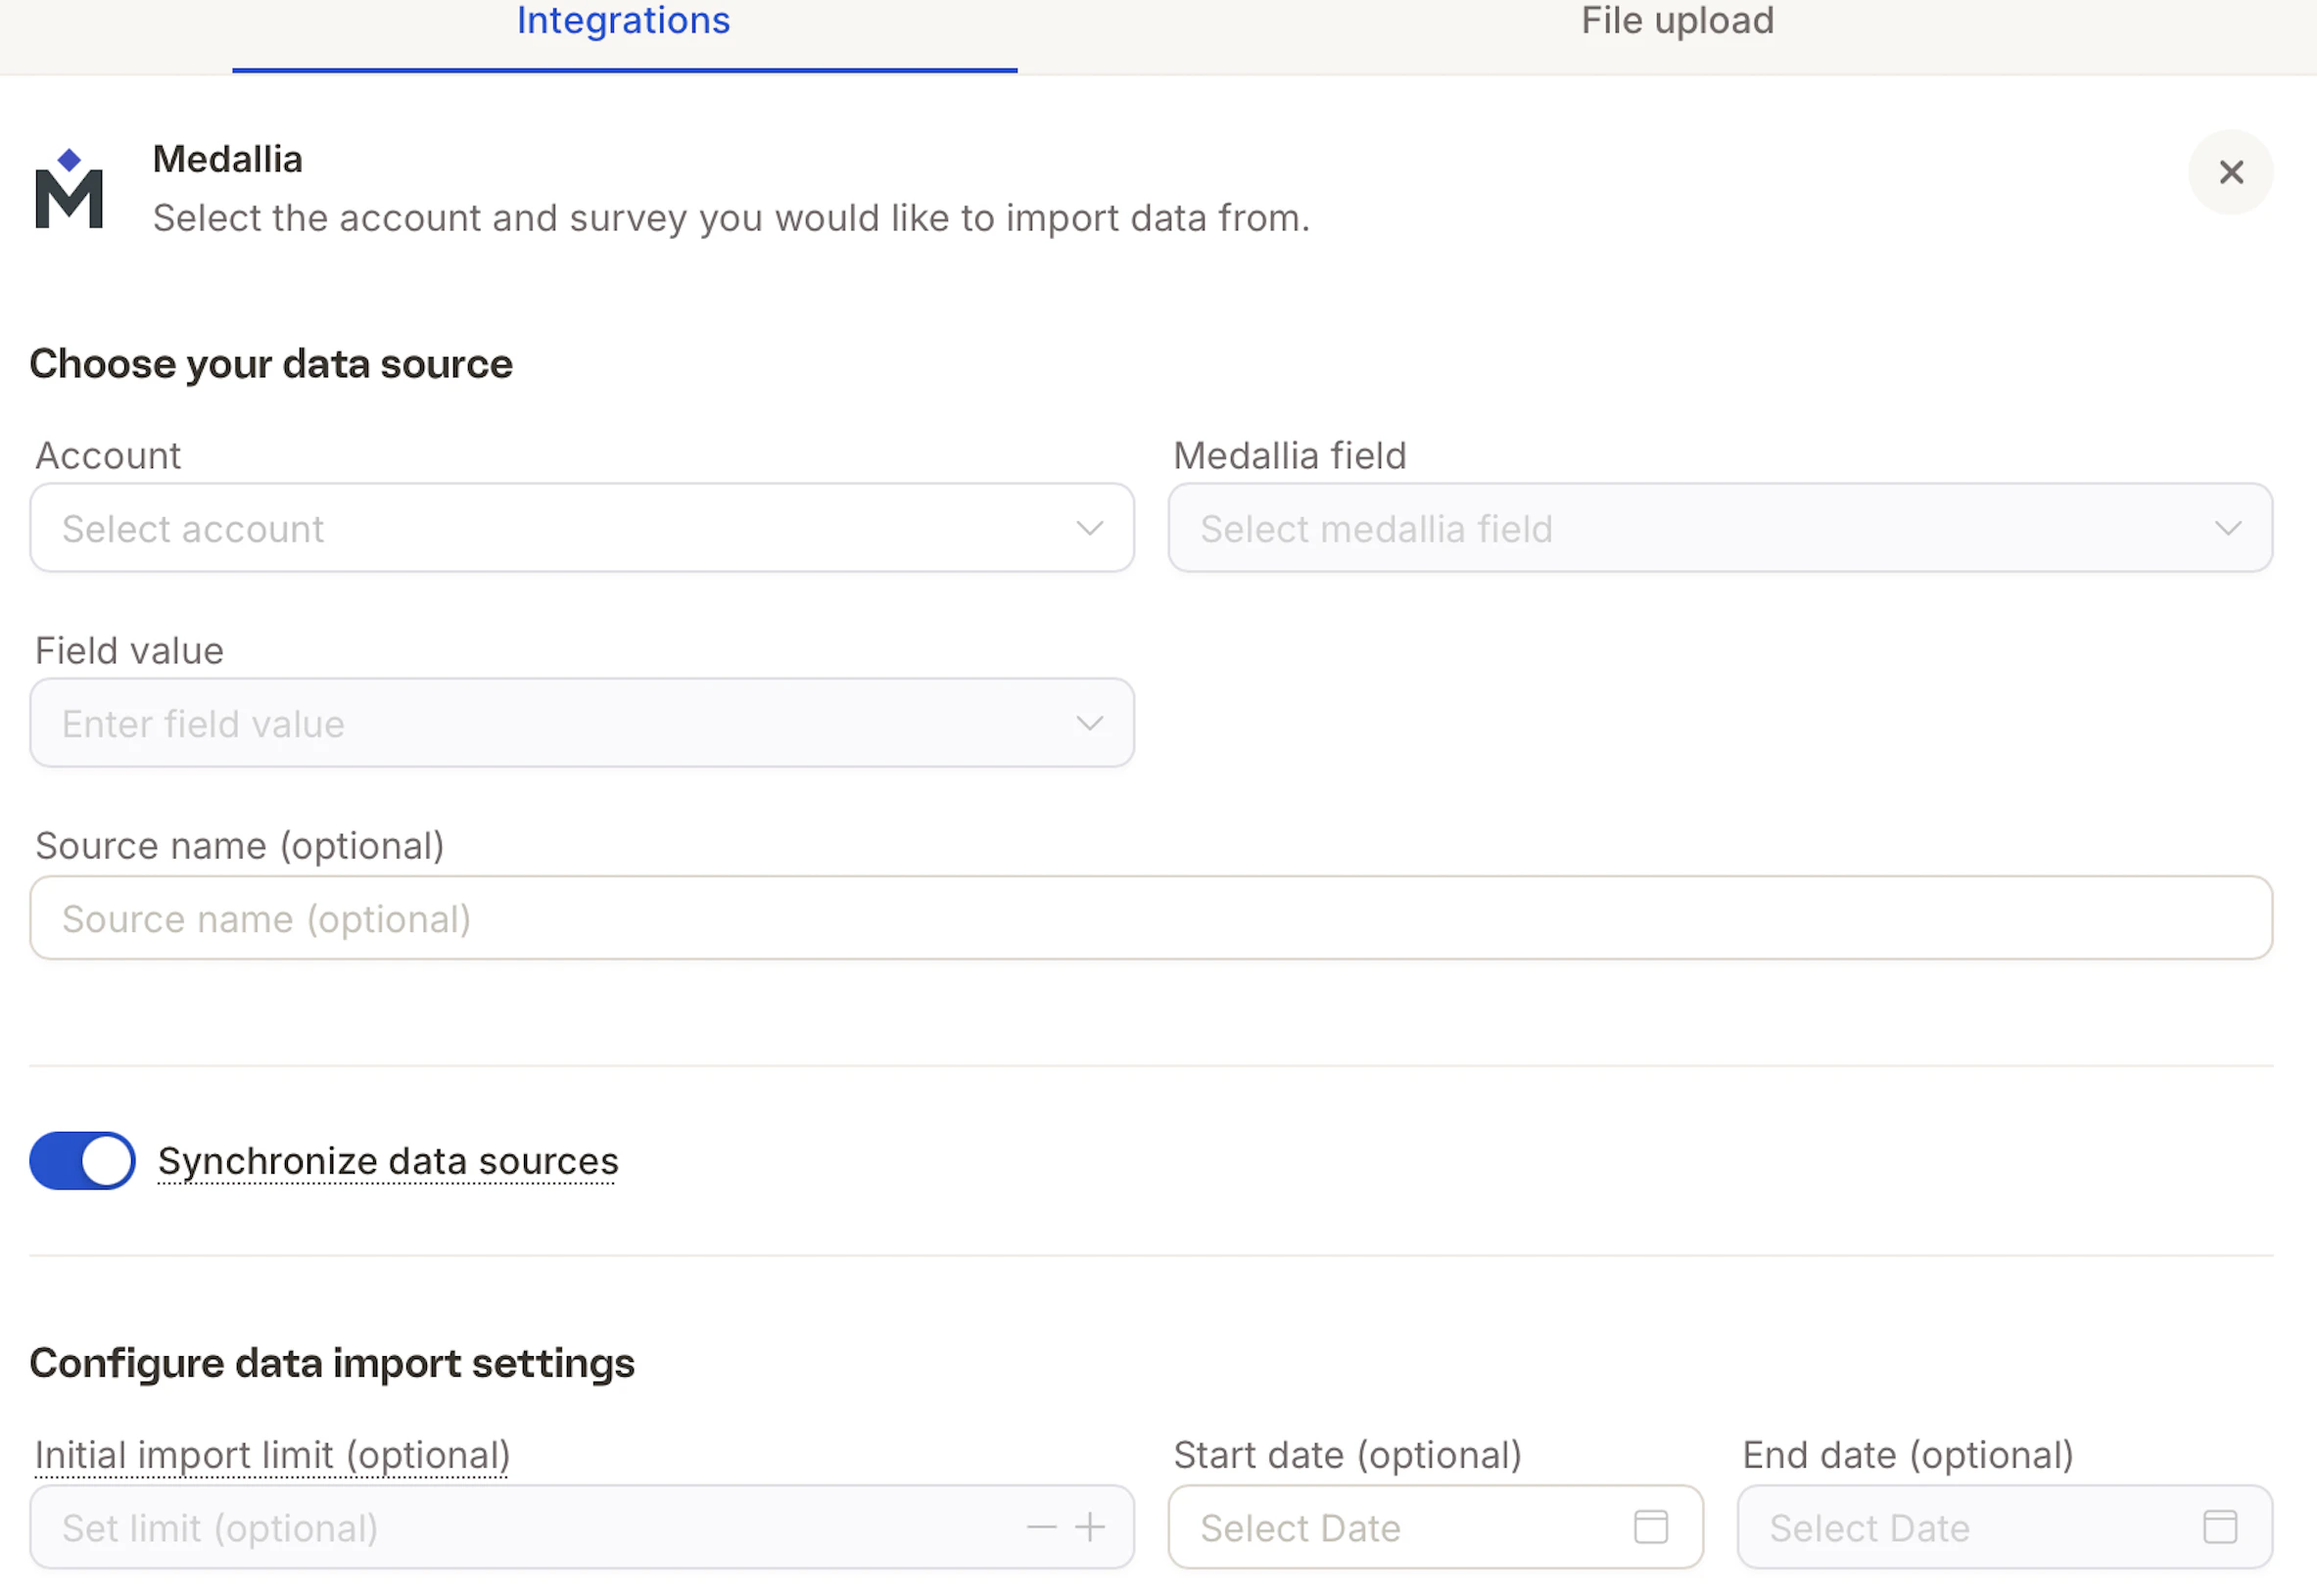
Medallia
Access Integration Settings
Log in to your Caplena account. Navigate to Account Settings → Integrations → Medallia.
Here you can find more info on the Settings page
Fill in Connection Details
Click Add Integration and complete: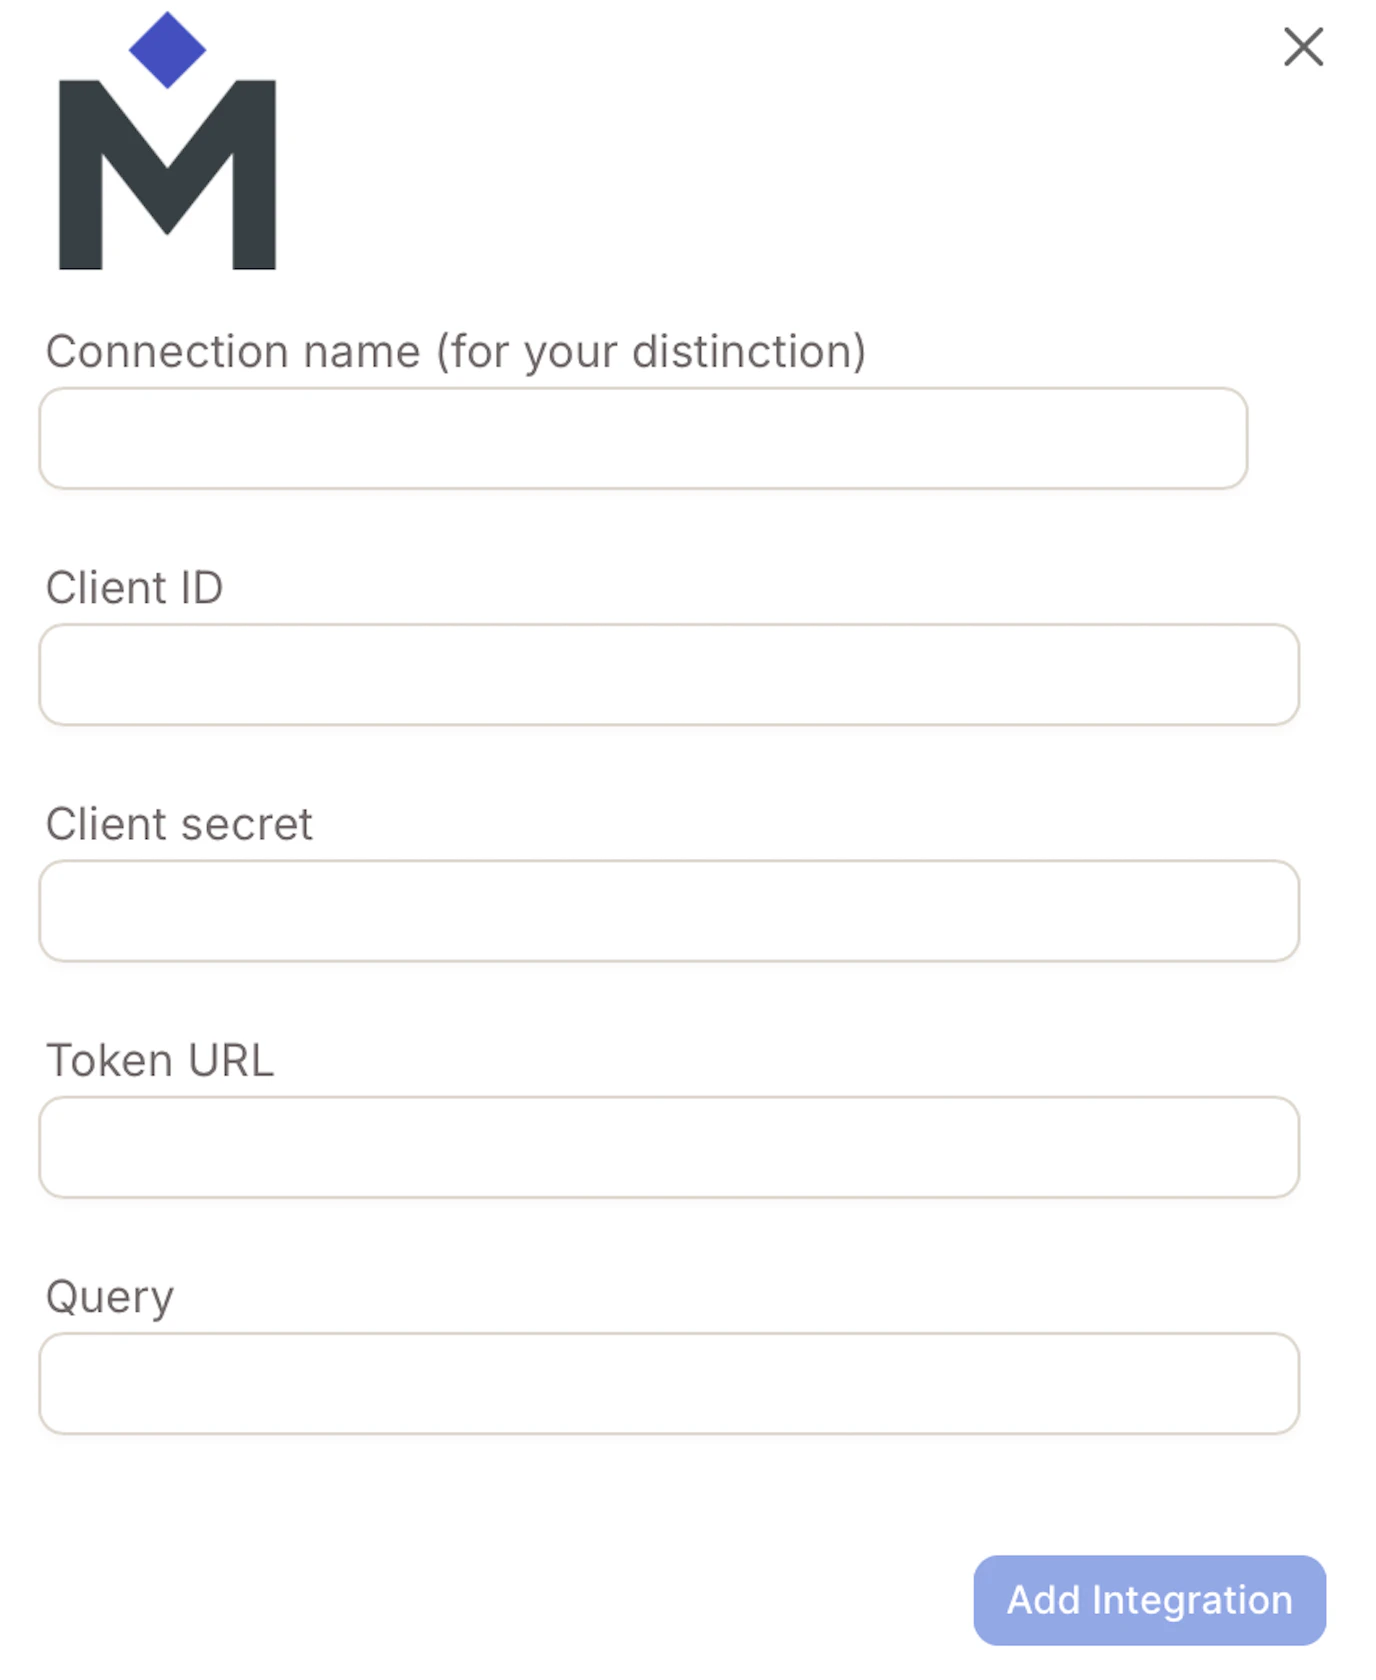
- Connection Name – e.g.
Medallia_NPS_Q4_2025 - Client ID – Provided by your Medallia administrator
- Client Secret – A secure key that works with your Client ID
- Token URL – e.g.
https://login.medallia.com/oauth/token - Query – The specific API endpoint to retrieve your feedback data
QuestionPro
Get your API Key and User ID
Generate your API key using QuestionPro’s instructions. Find your User/Customer ID under My Account → Partner License.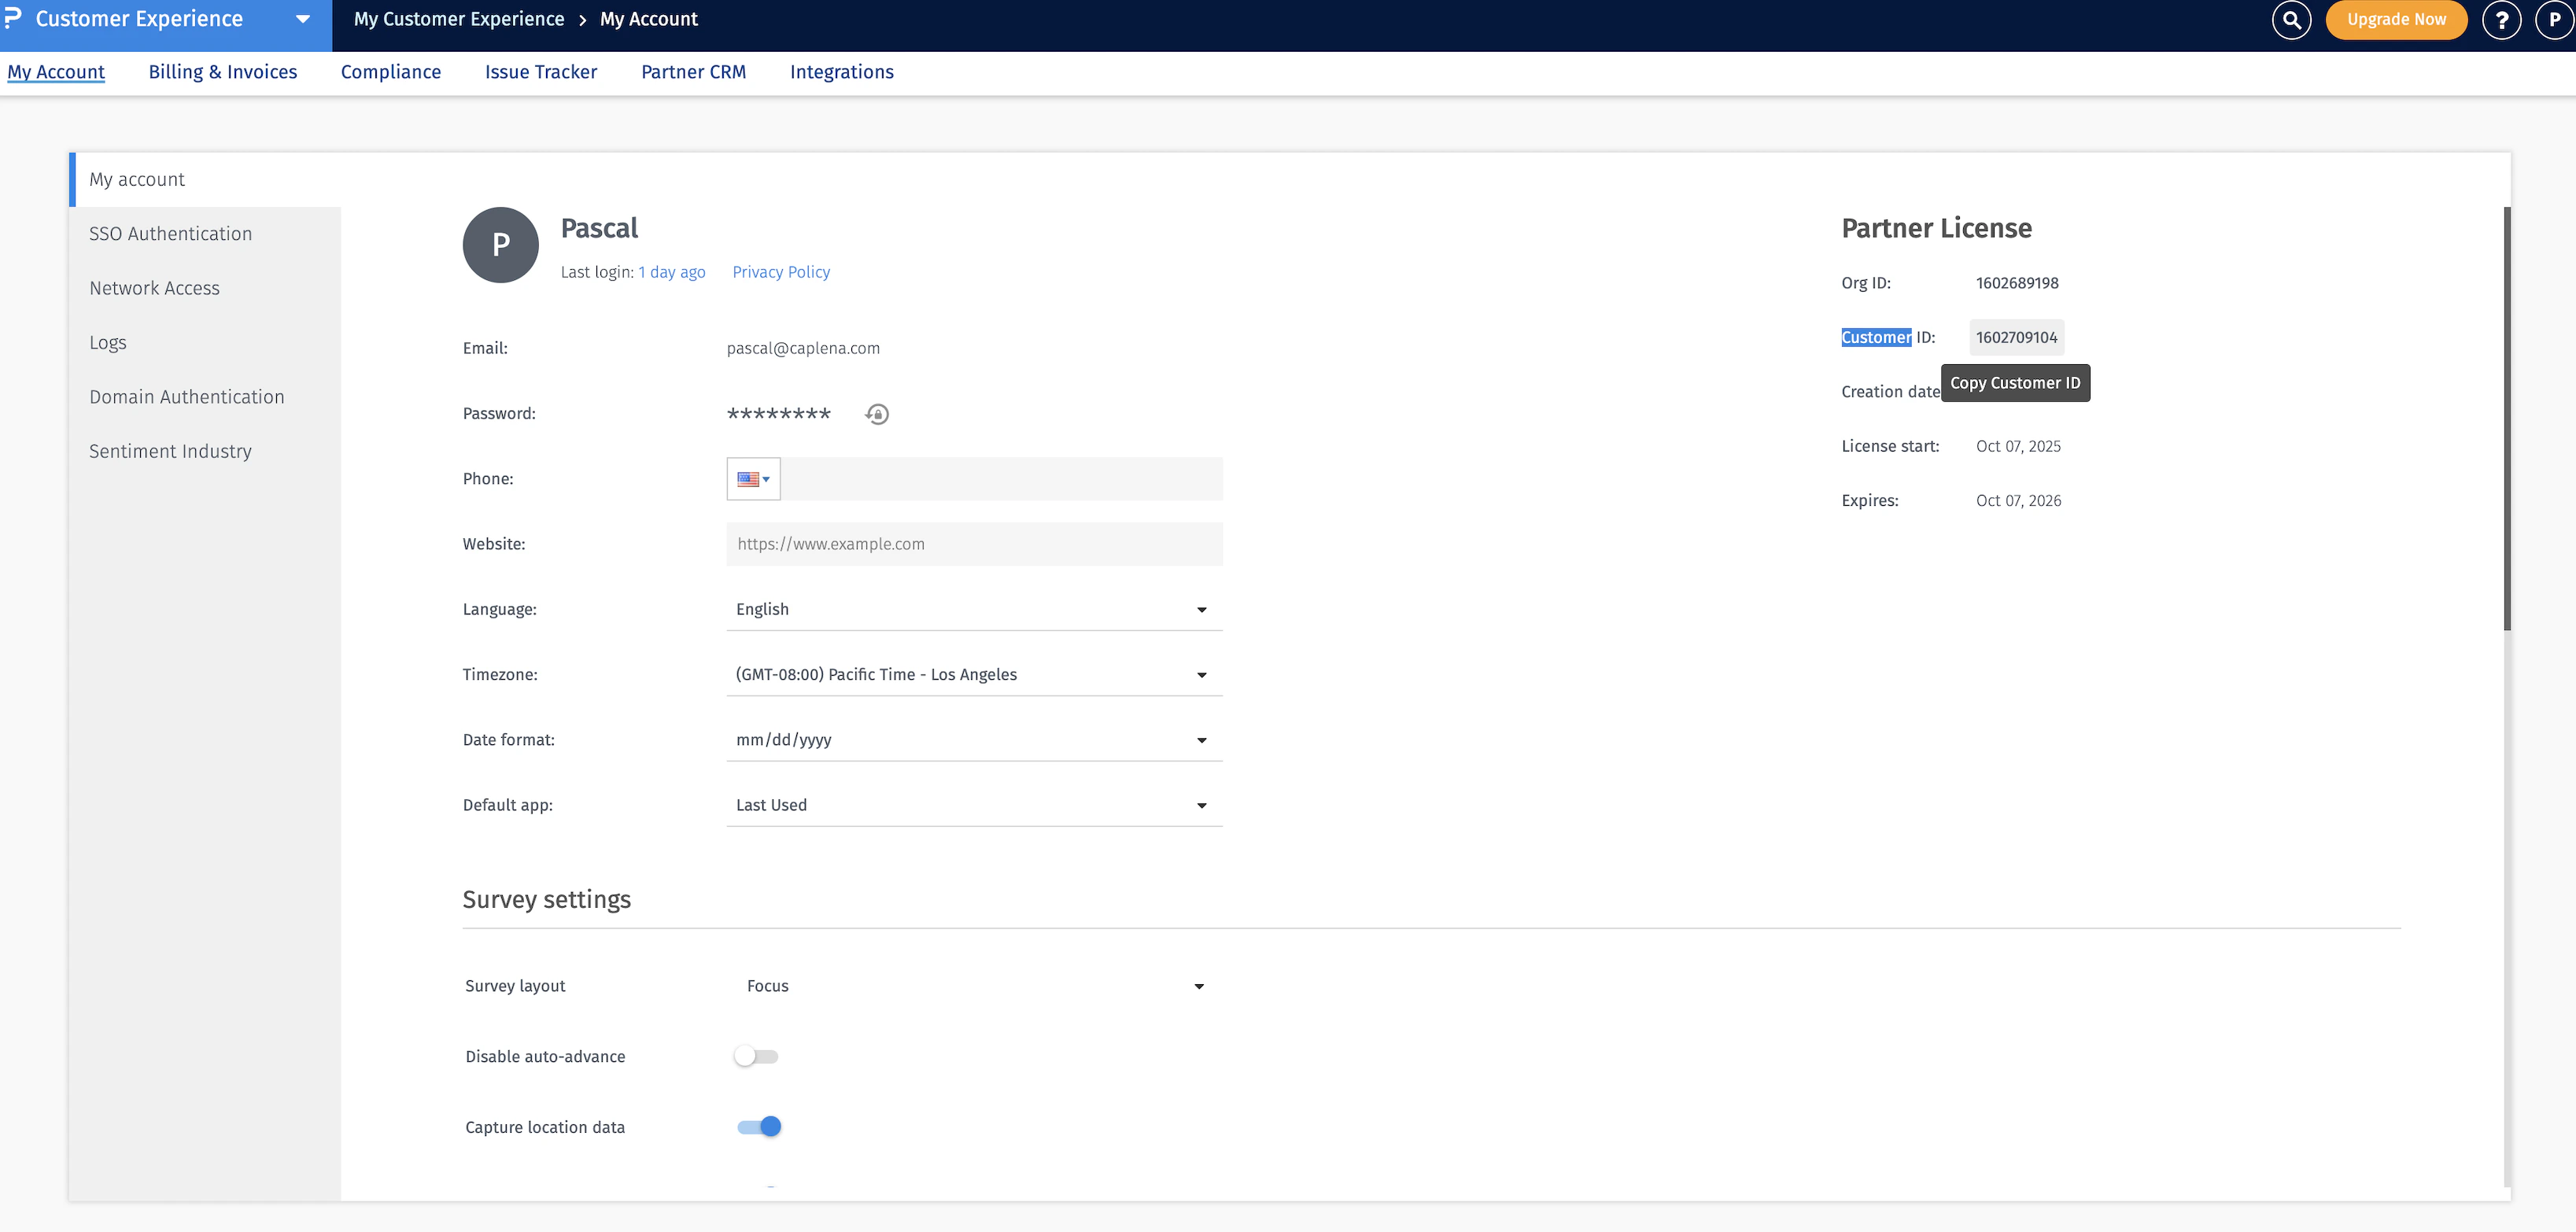
Connect in Caplena
Go to Settings → Integrations → Add Integration → QuestionPro. Fill in: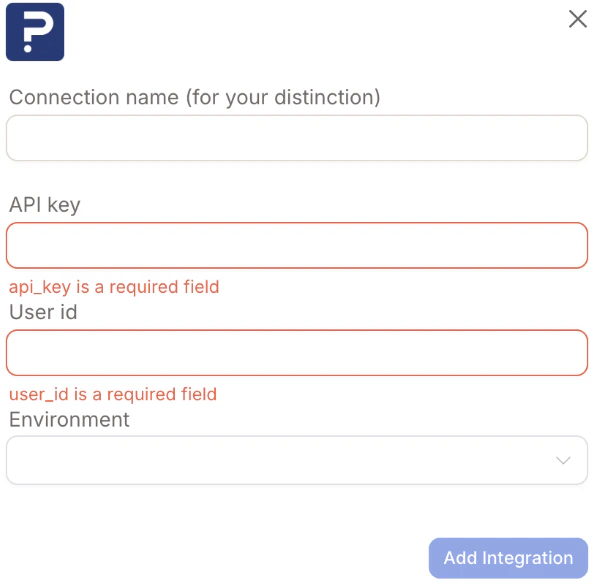
- Connection name – Any name to help you recognize the integration
- API key – Paste the API key you generated
- User ID – Paste your QuestionPro Customer ID
- Environment – Choose Production unless using a sandbox
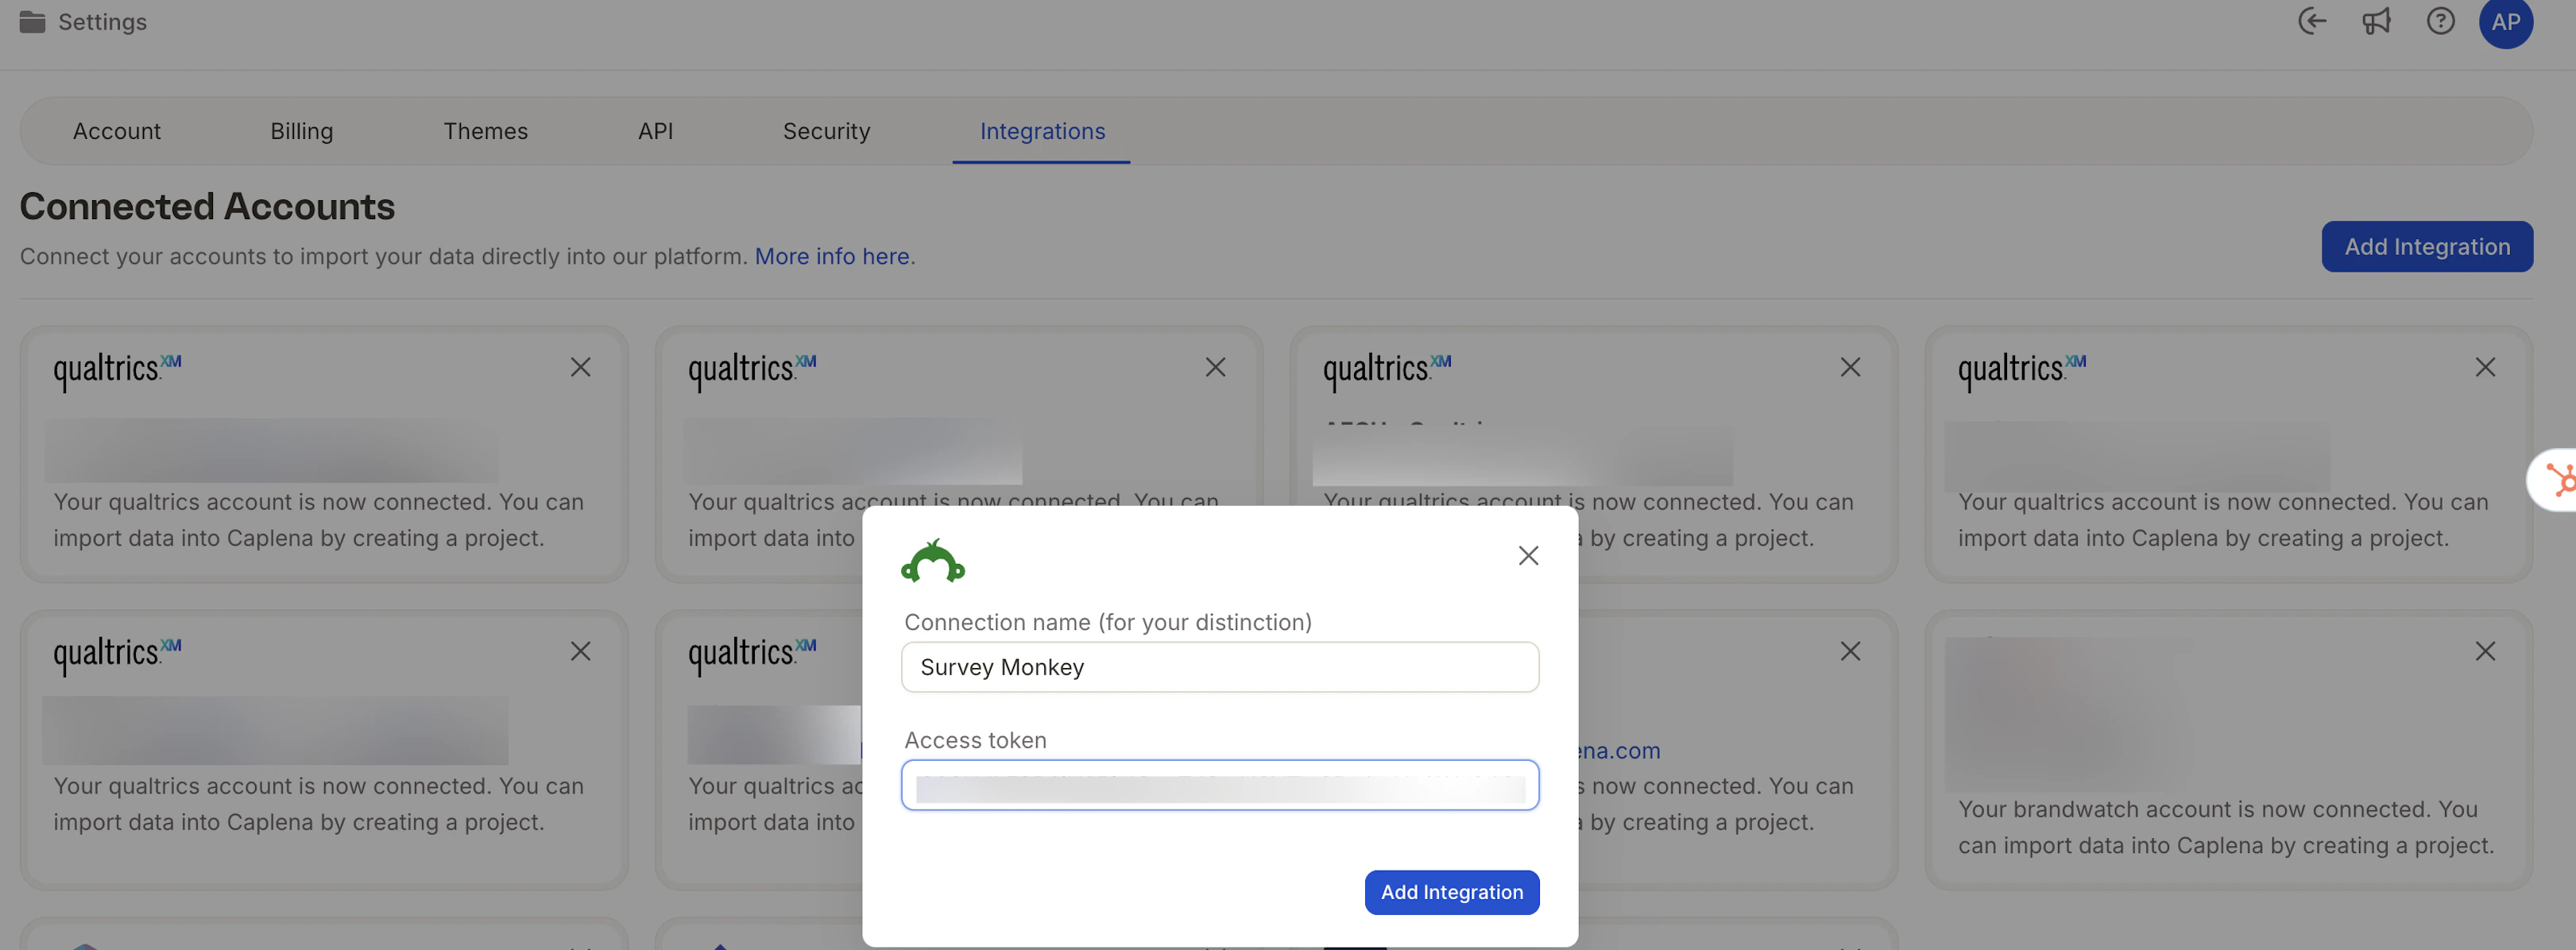
SurveyMonkey
Create an App in SurveyMonkey
Go to the SurveyMonkey Developer Portal. Click Create App, give it a name (e.g. “Caplena Integration”), and choose Private App.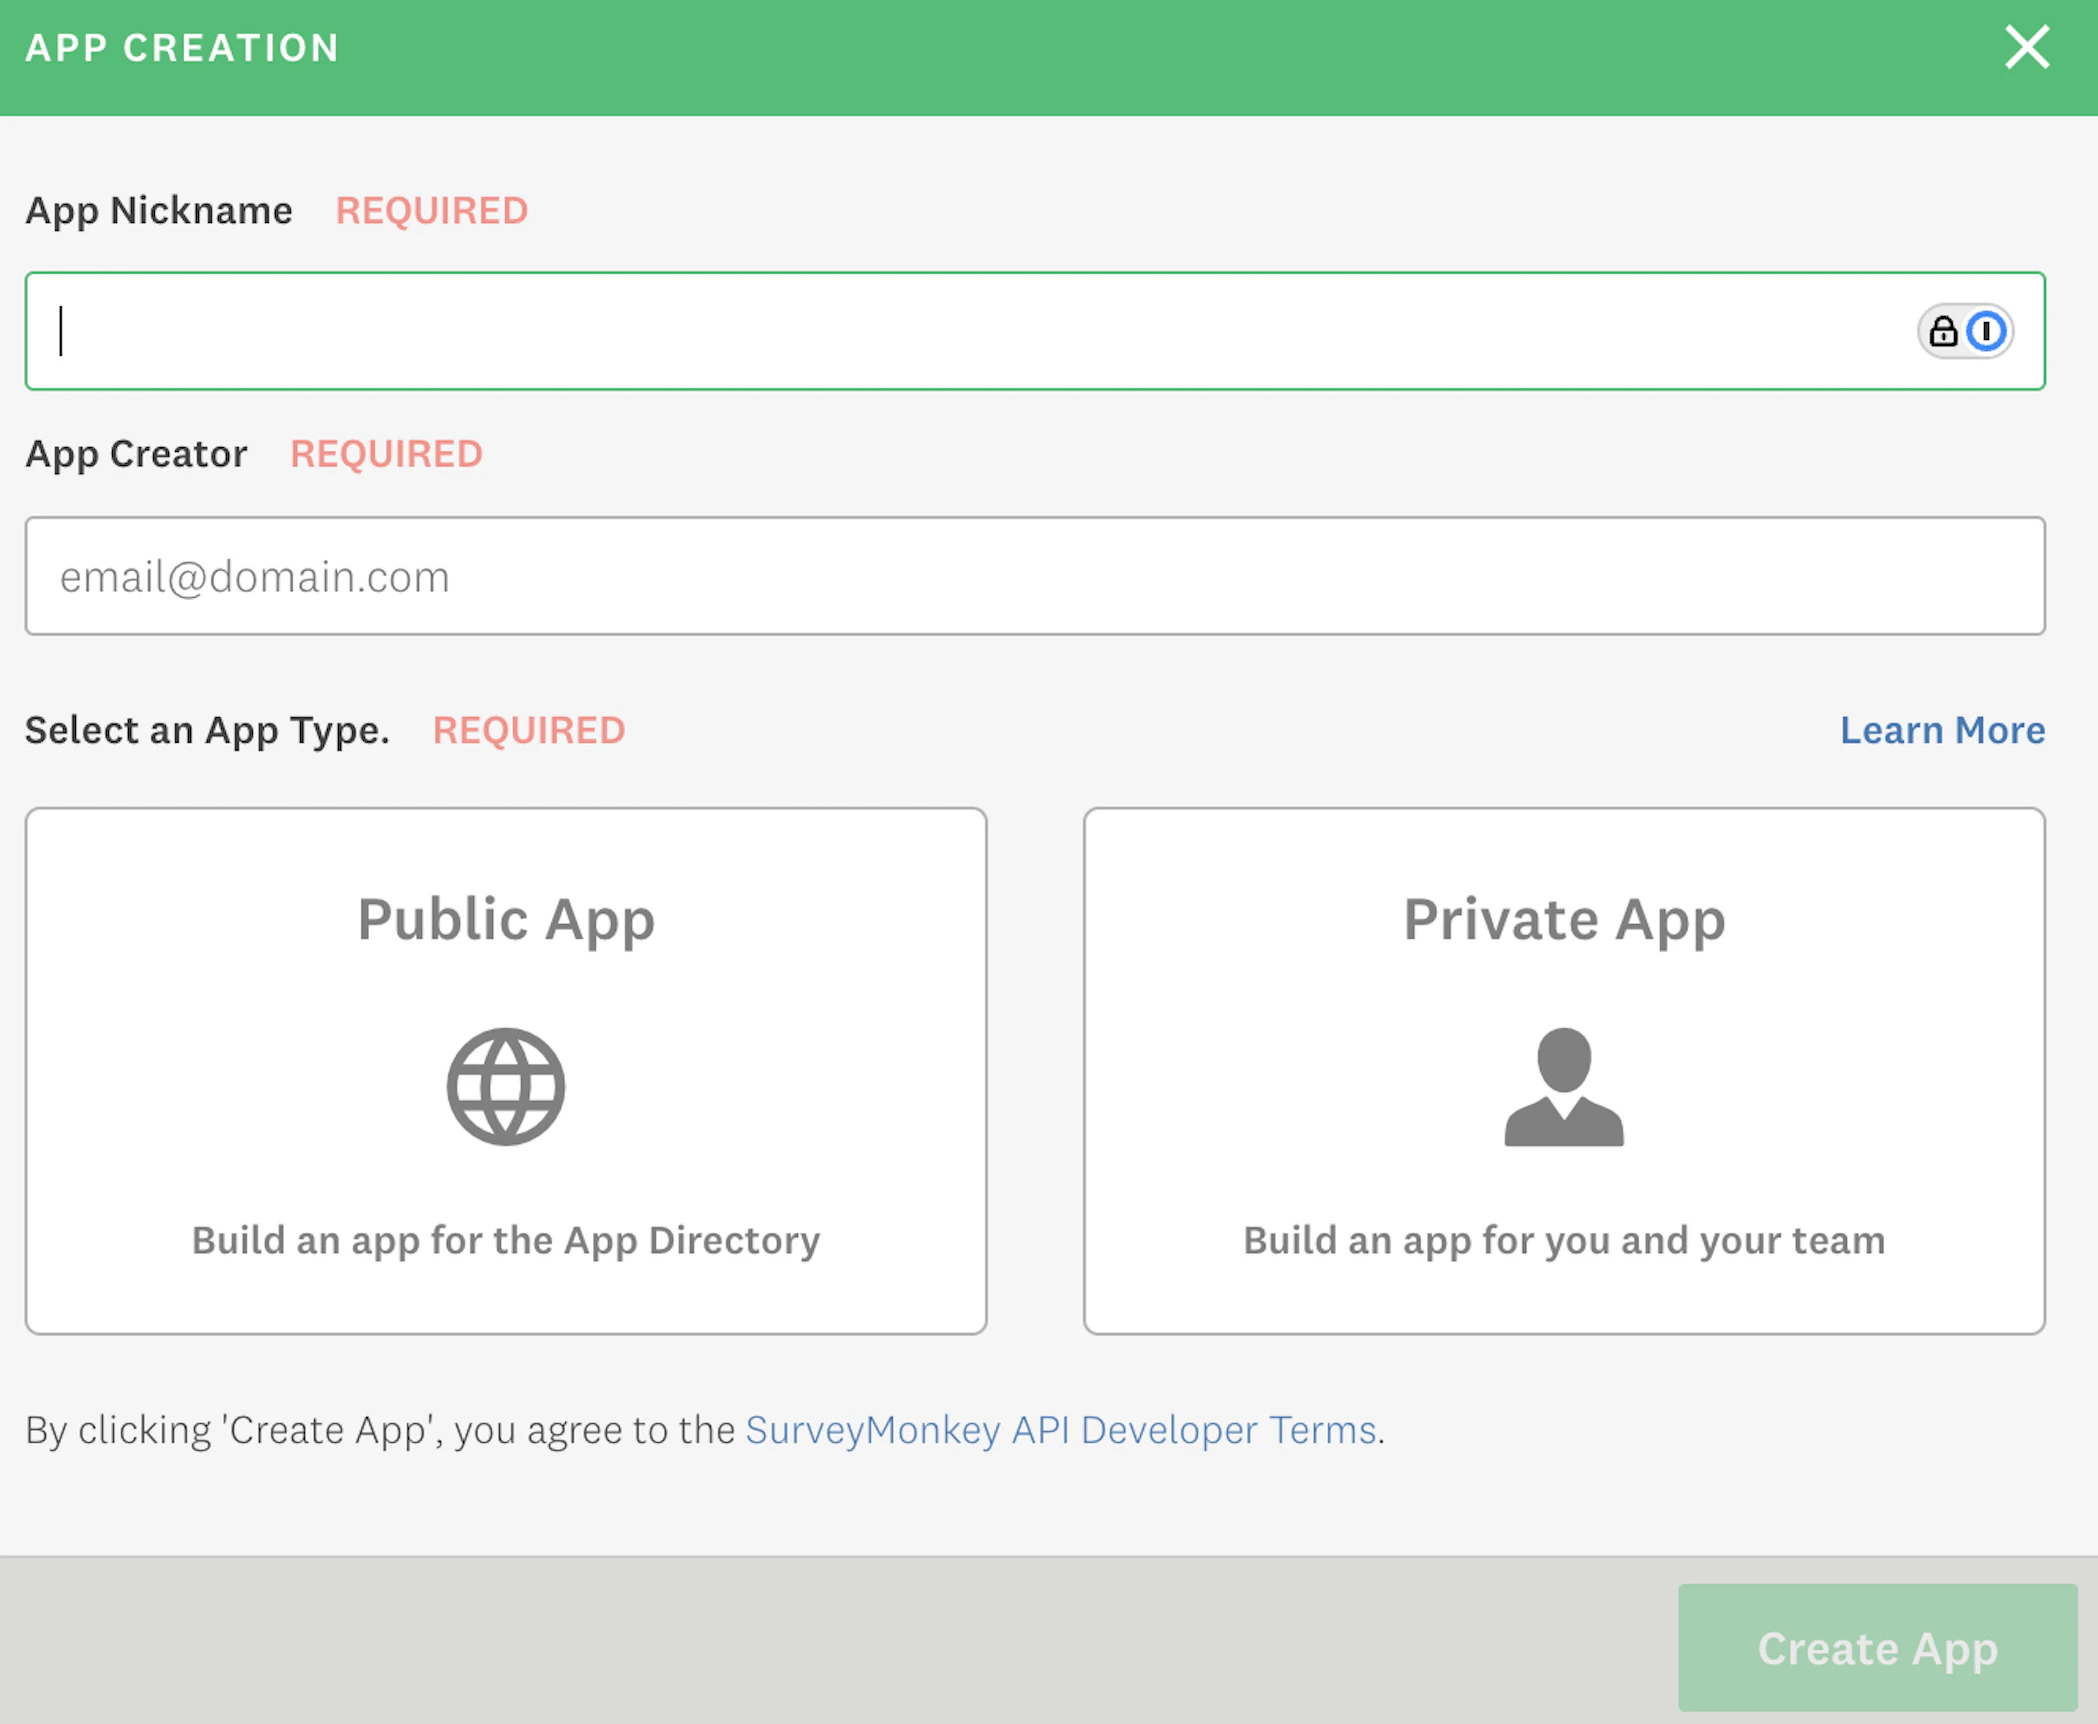
Configure Scopes
Open the app settings and under Scopes, enable at minimum the required read scopes.
Generate and Copy Your Access Token
In the app menu, go to Credentials → Generate Access Token. Copy the token — you’ll need it in Caplena.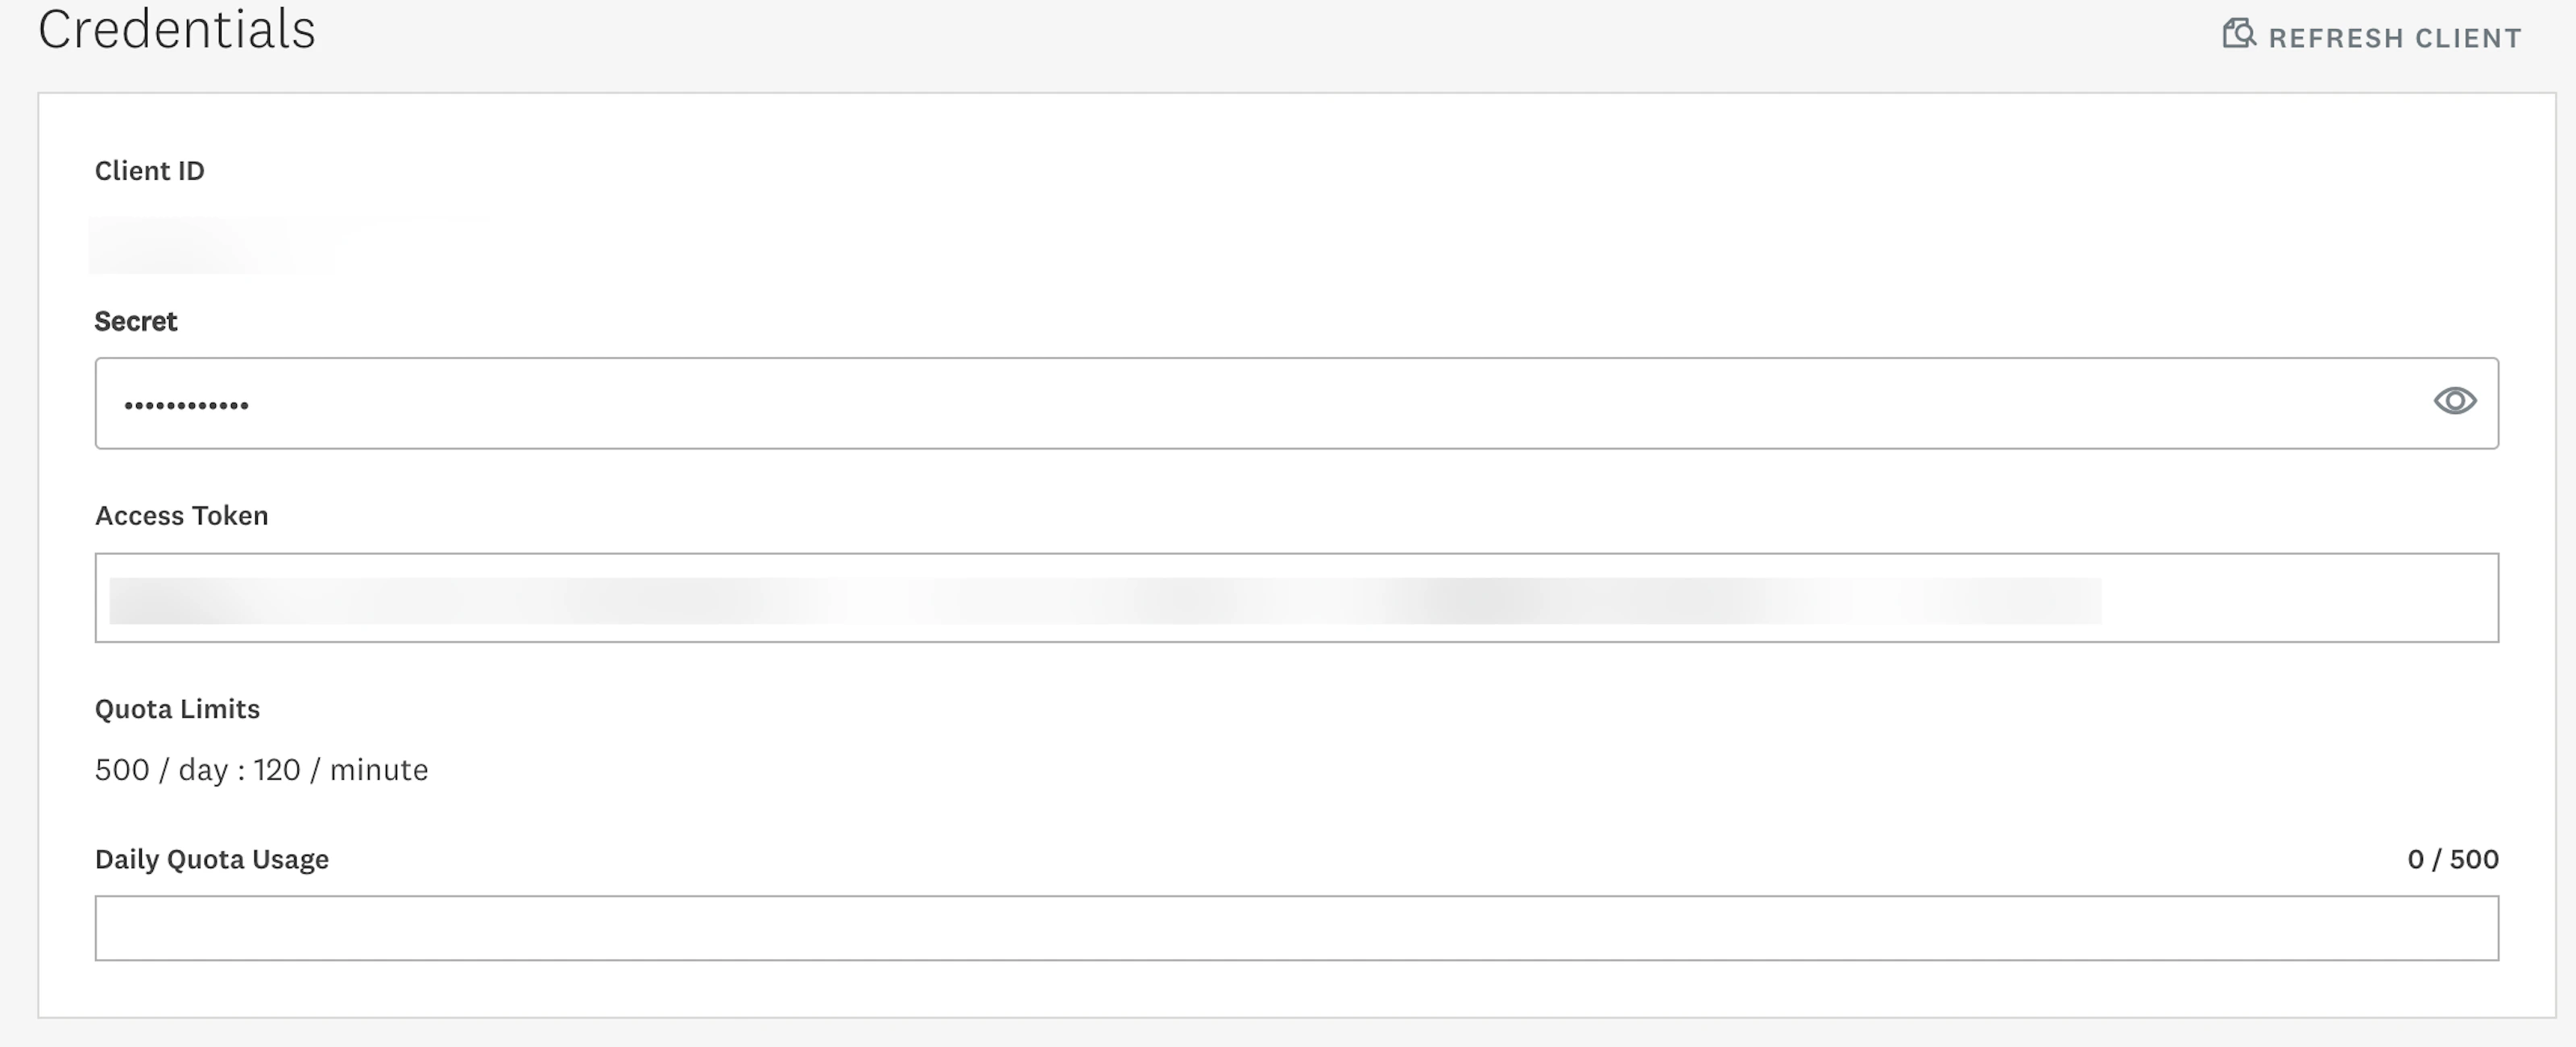
Google Cloud Storage (GCS)
Connect a file stored in GCS so your project refreshes automatically overnight.Set Up Google Cloud Storage
Complete the following in Google Cloud:
- Create a bucket
- Create a Service Account and JSON Key
- Grant the Service Account access to your bucket
- Copy your file’s GCS URI (e.g.
gs://your-bucket-name/path/to/file.csv)
.csv and .parquet. Your file must include an identifier column and a date column.Connect in Caplena
Go to Integrations → Add Integration → Google Storage File (GStorageFile). Fill in: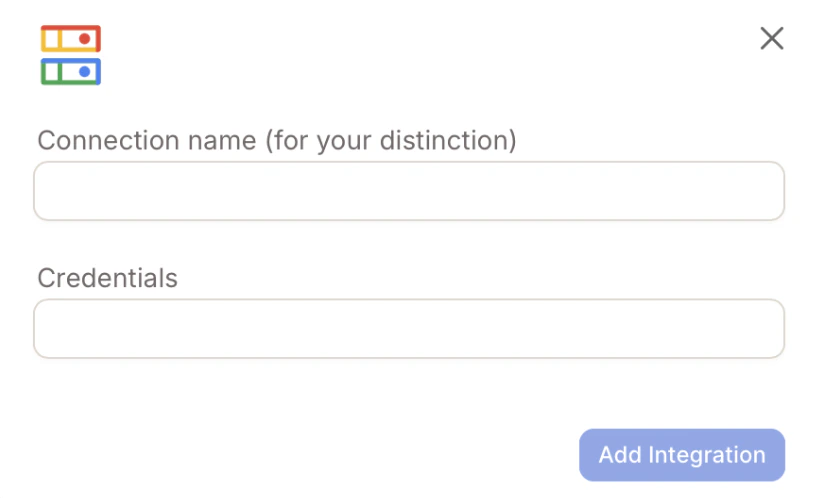
- Connection name – Any name to help you recognize this connection
- Credentials – Paste the entire JSON content of your service account key (do not upload a file — paste the JSON text)
Configure Data Import
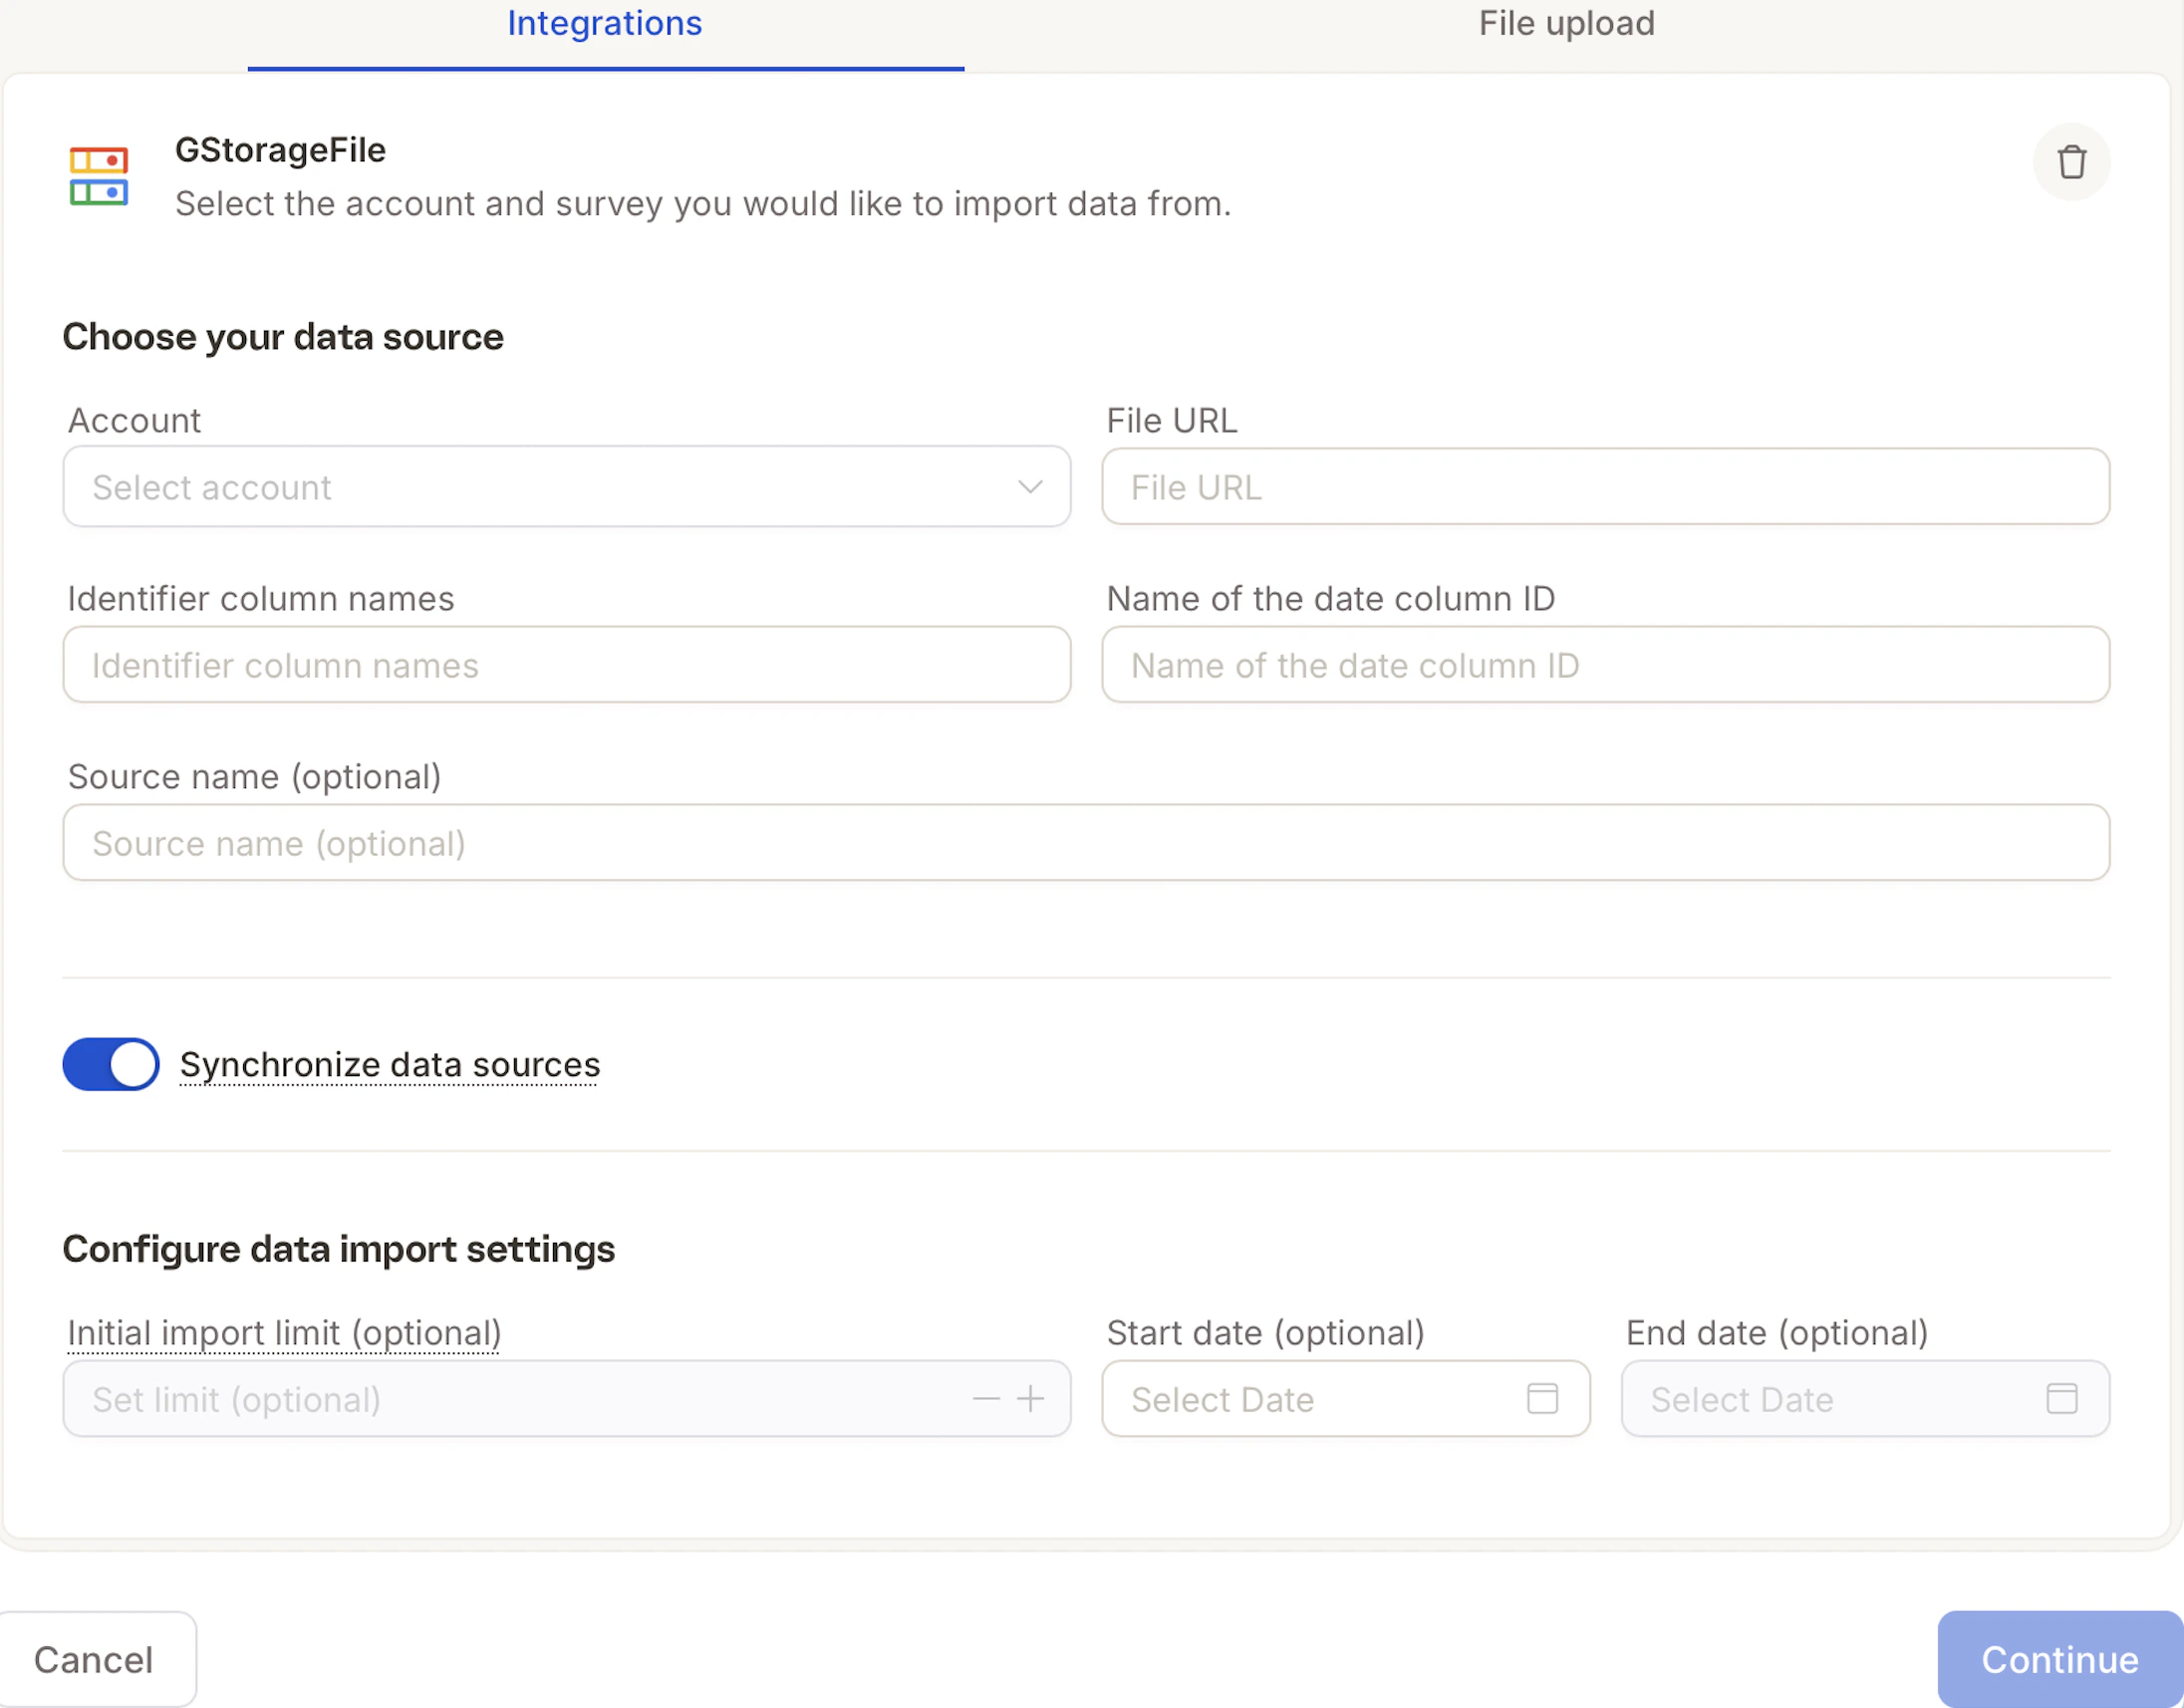
- Account – Select the integration you just created
- File URL – Paste your
gs://file URI - Identifier column name – The column that uniquely identifies each row (e.g.
id,response_id) - Date column name – The date/timestamp column used to detect new data (e.g.
created_at) - Source name (optional) – A label that will appear in your project
Decipher
Generate Your Decipher API Key
In your Decipher account, open the user menu (top right) → API Access → Create API key.
Connect in Caplena
Navigate to Account Settings → Integrations → Decipher. Click Add Account and fill in: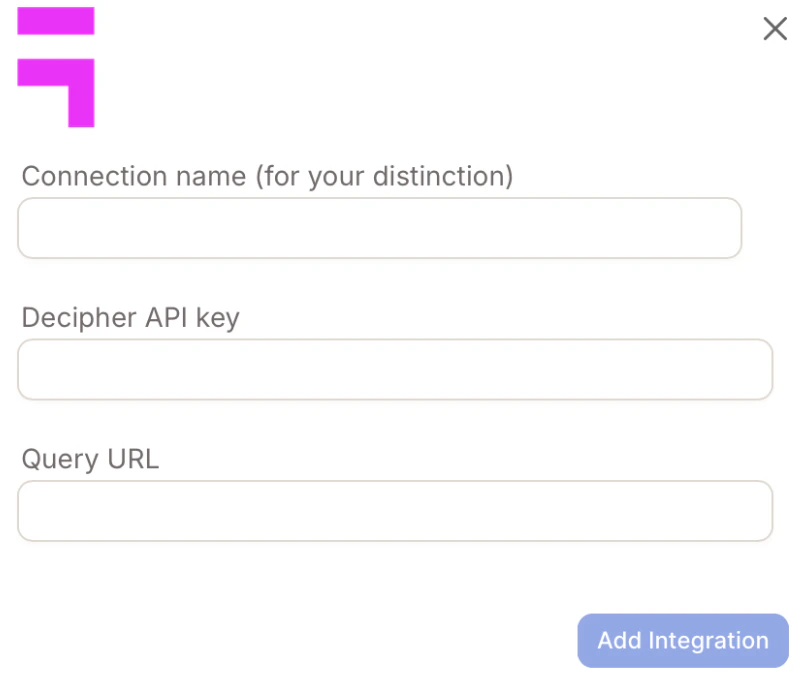
- Connection name – e.g. “Decipher – US Surveys”
- Decipher API key – Paste the key generated above
- Query URL – Your Decipher instance URL
Intercom
Add Your Intercom Account
Navigate to Account Settings → Integrations → Intercom. Click Add Account and fill in: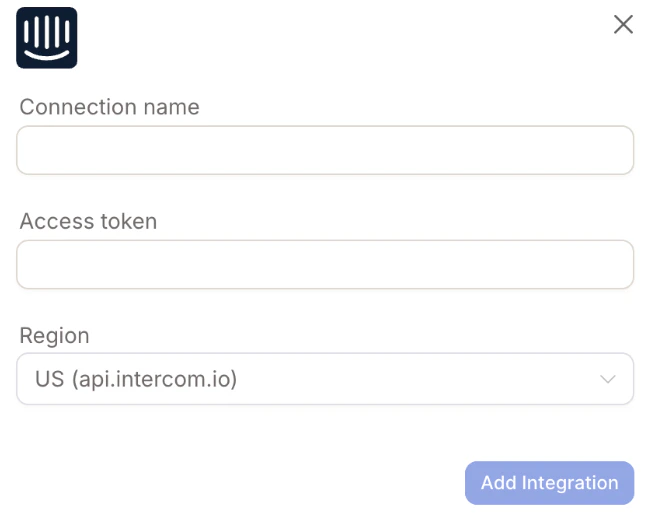
- Connection name – e.g. “Intercom Production”
- Access token – From your Intercom Developer Hub
- Region – US (
api.intercom.io), EU (api.eu.intercom.io), or AU (api.au.intercom.io)
Import Data
Go to Projects → Import Data → Intercom. Choose your Account and Survey type.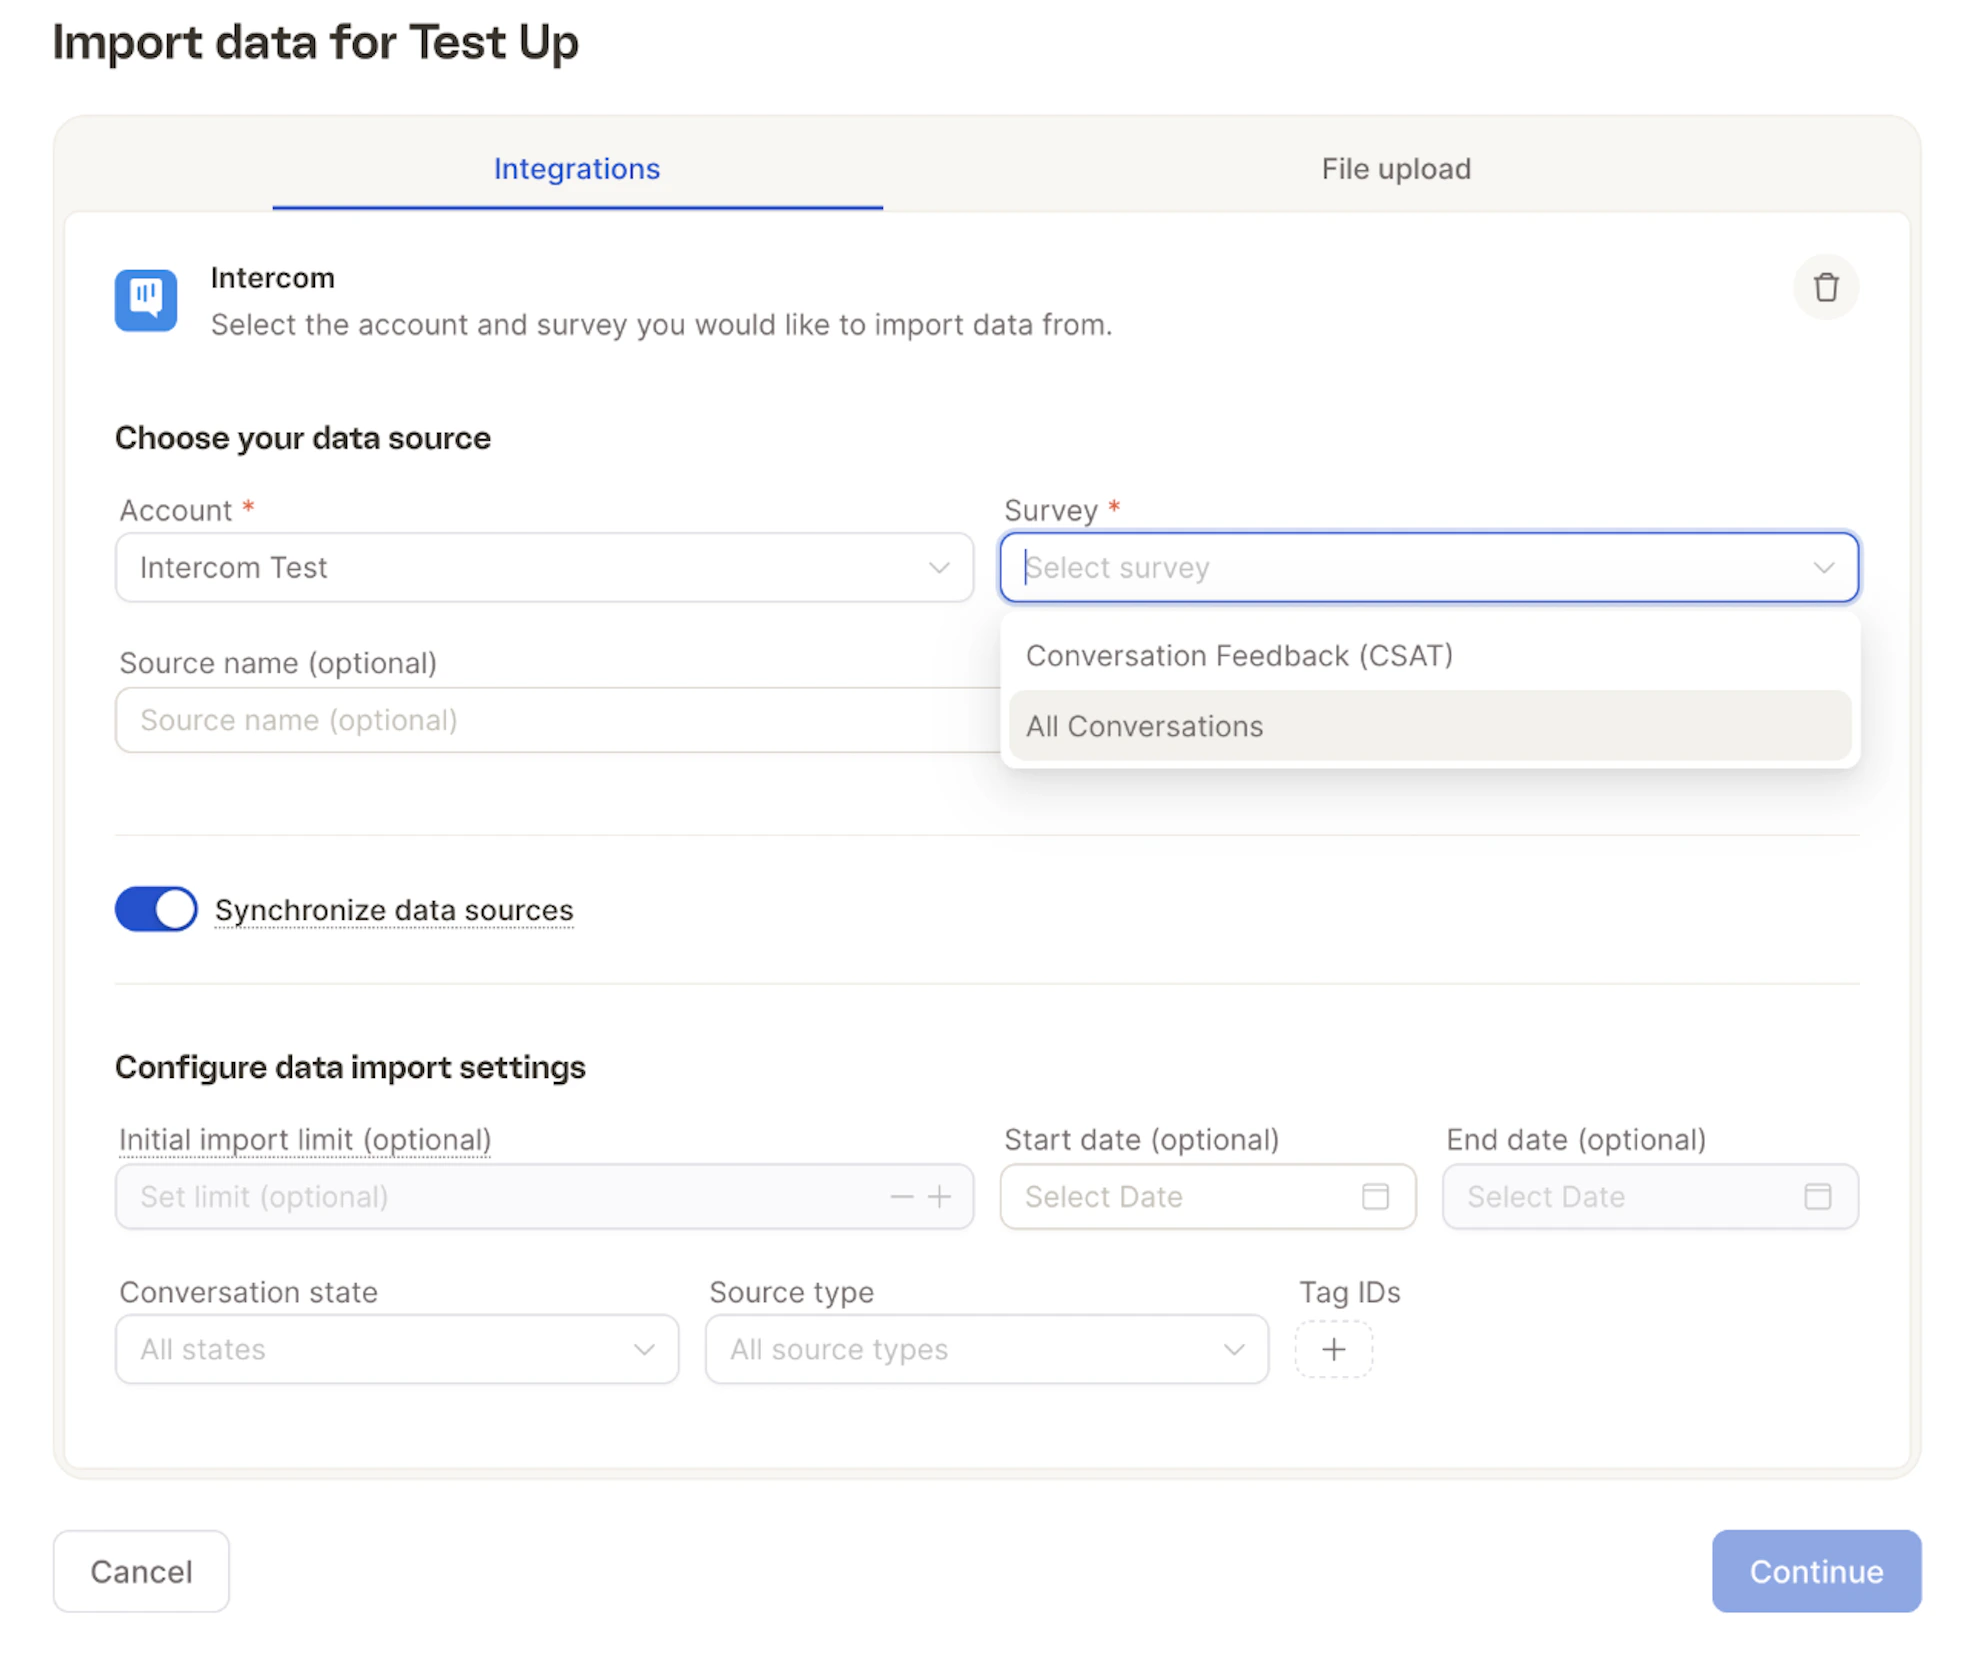
- Initial import limit, start/end date
- Conversation state (open, closed, snoozed)
- Source type (Conversation, Email, WhatsApp, etc.)
- Tag IDs
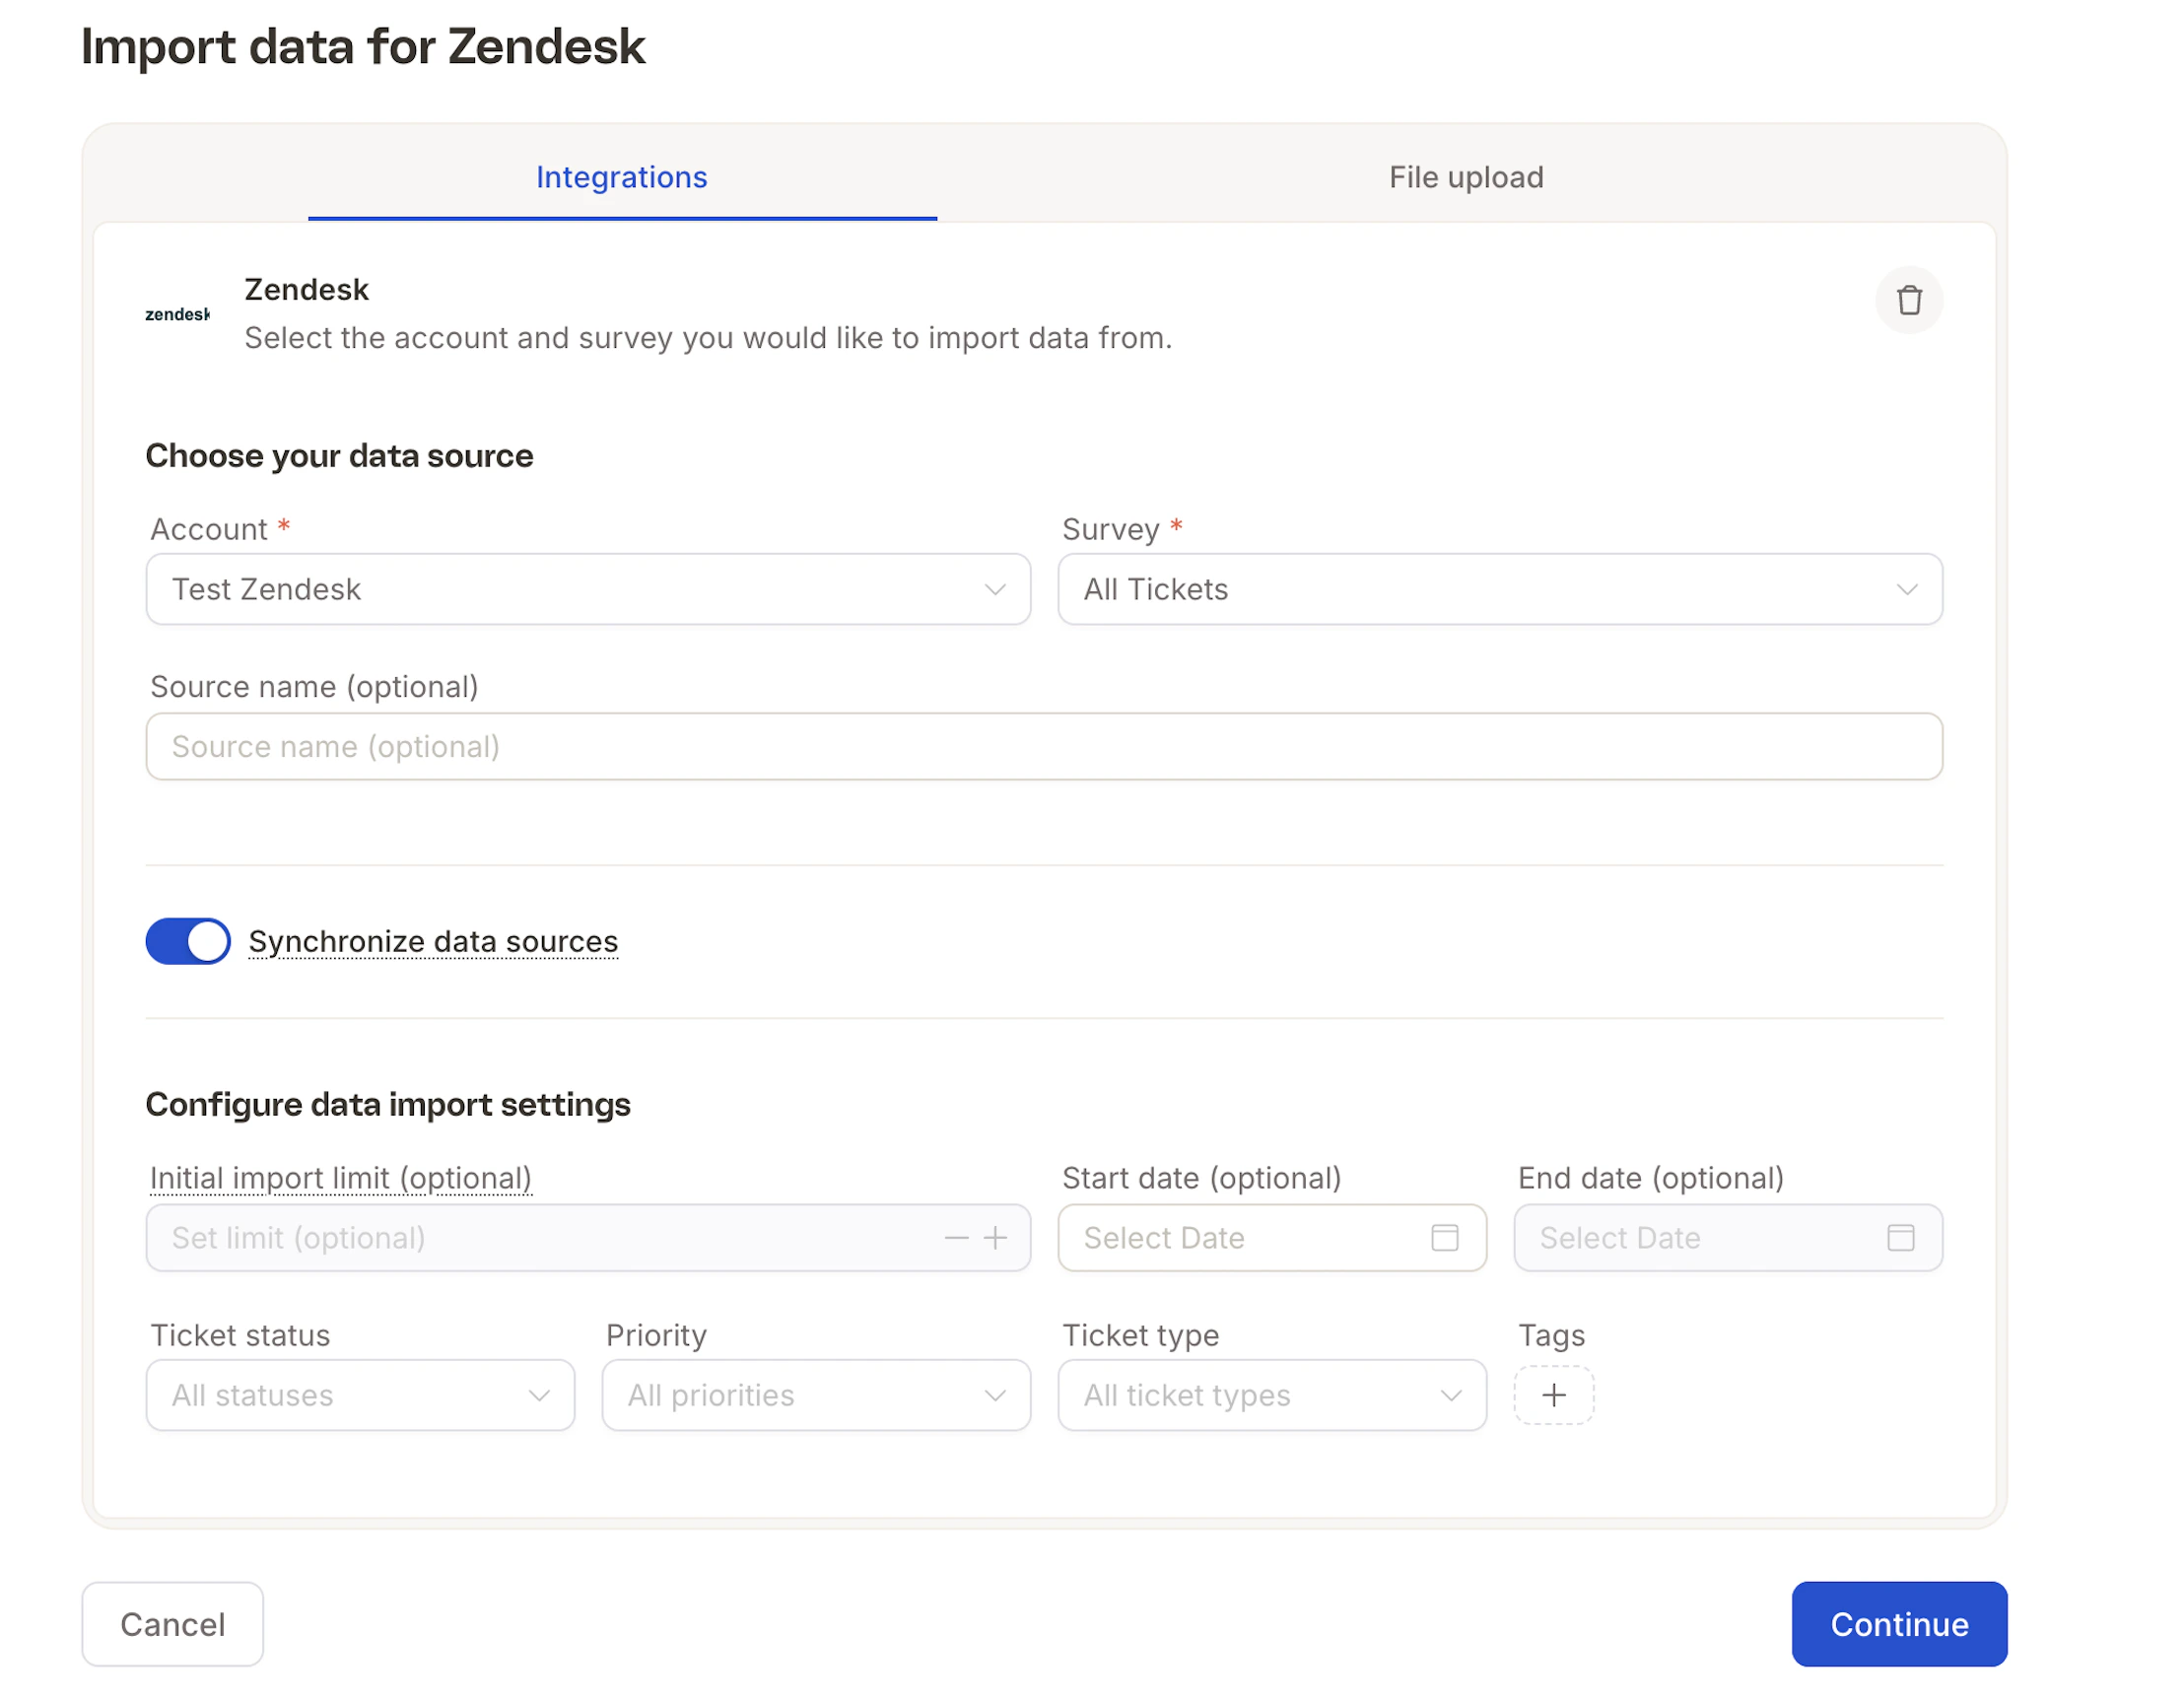
Zendesk
Import and analyze Zendesk ticket data and CSAT responses directly in Caplena.Set up OAuth in Zendesk
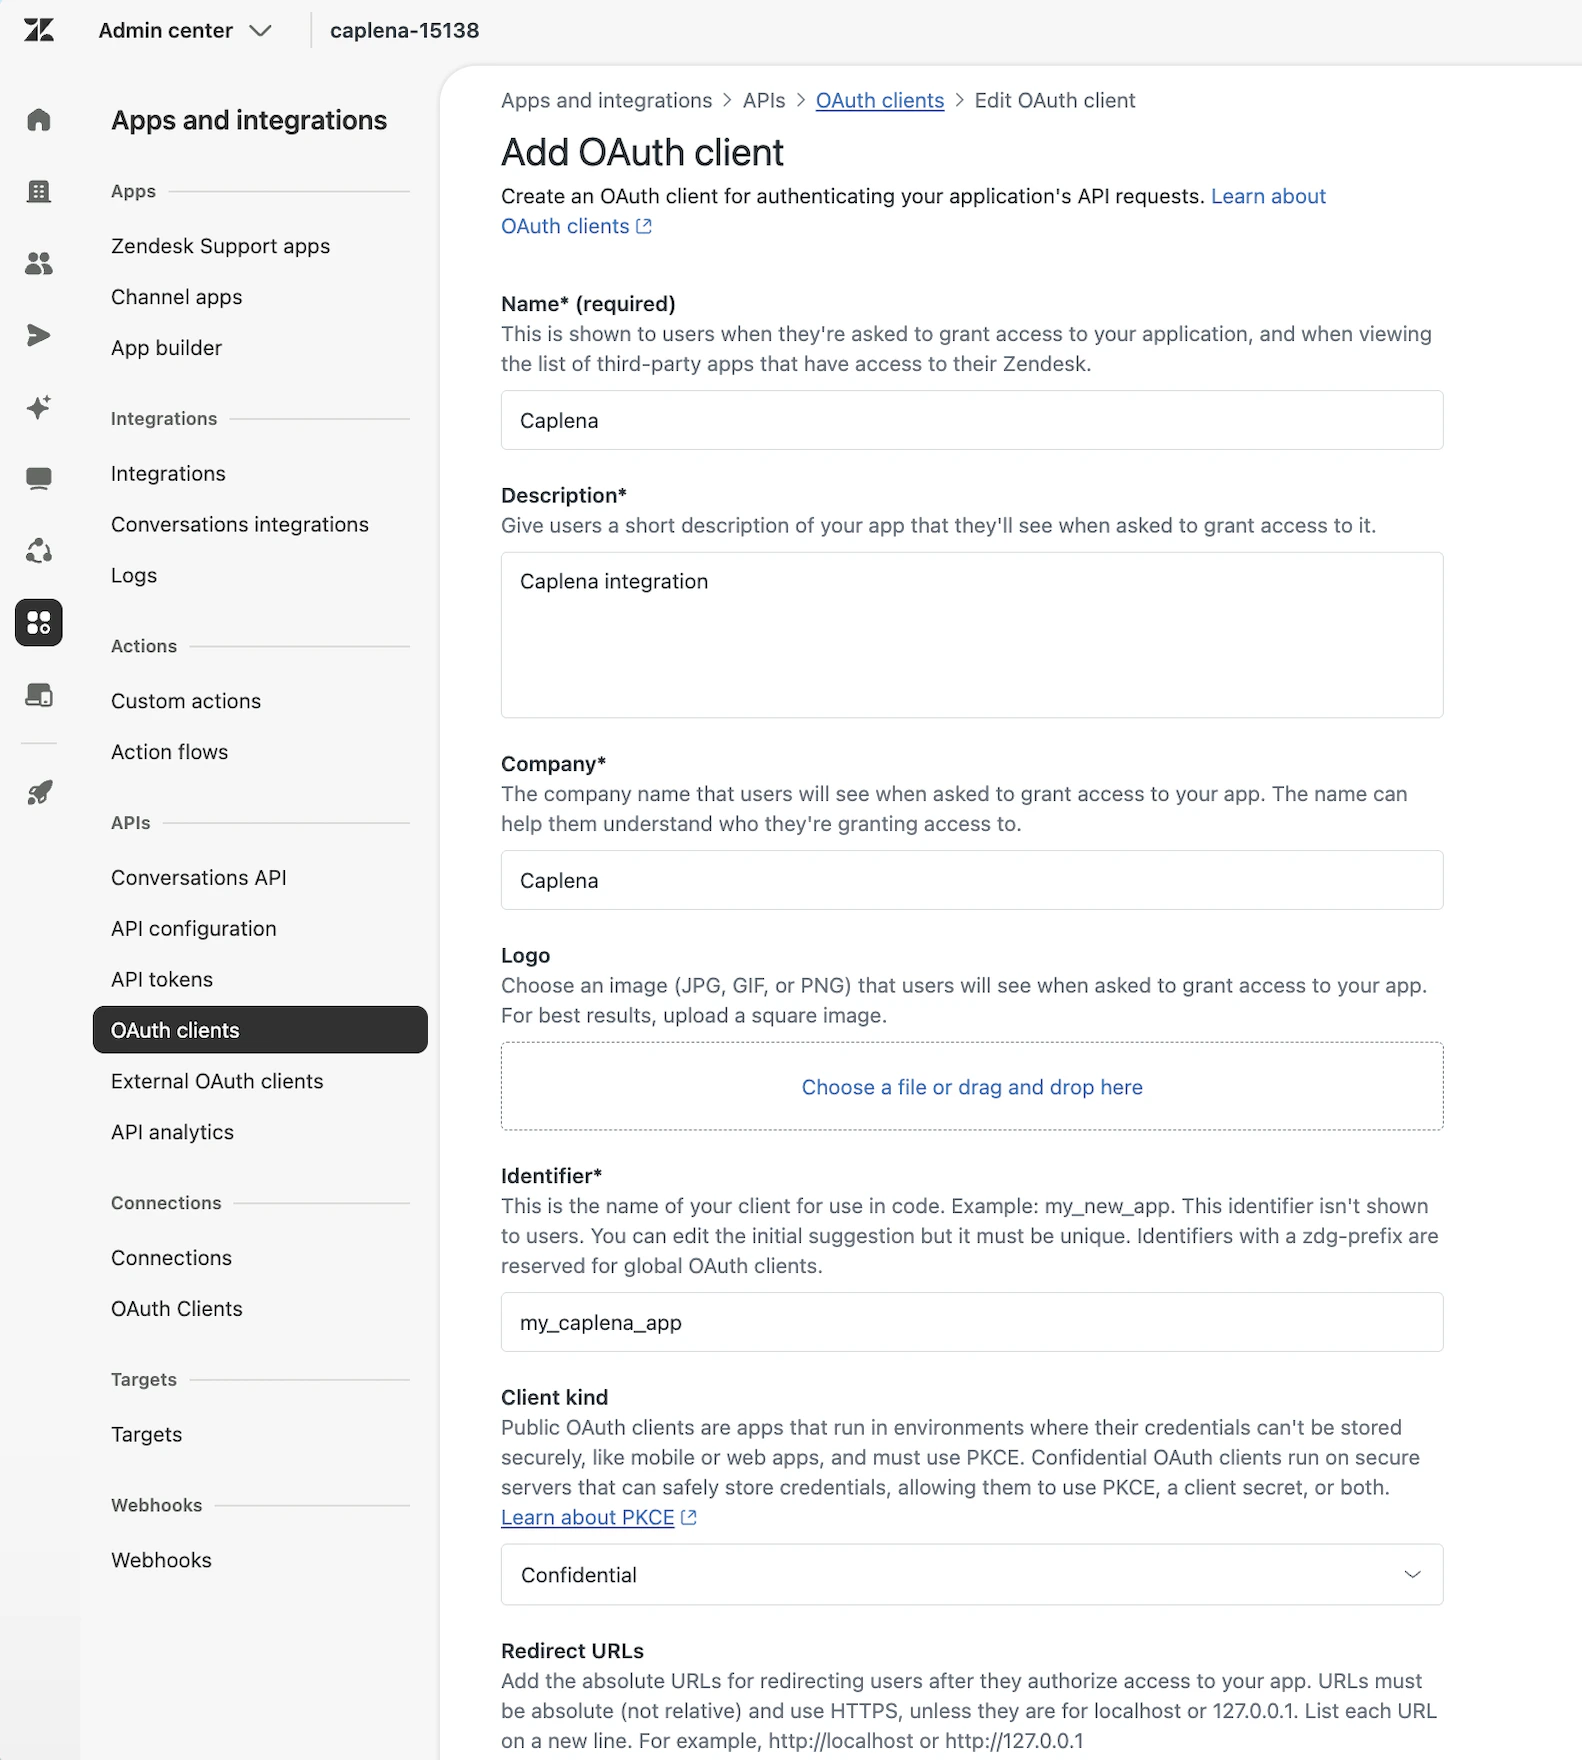
Before connecting to Caplena, create an OAuth client in your Zendesk account. Follow the official Zendesk documentation and use these settings:
- Redirect URL –
https://api.caplena.com/api/ui/integrations/zendesk/oauth/callback - Client kind – Confidential
Open Integration Settings in Caplena
Log in to your Caplena account. Navigate to Account Settings → Integrations. In the top-right section, select Zendesk.
Here you can find more info on the Settings page.
Add Your Zendesk Account
Click Add Account and fill in:
- Connection name – e.g. “Zendesk Production”
- Client ID – The “Identifier” from your OAuth setup in Zendesk
- Client secret – The secret copied during OAuth setup
- Company subdomain – e.g.
yourcompanyforyourcompany.zendesk.com
Connect the Account
Click Add Integration. You’ll be redirected to Zendesk — approve the read-only permissions. Once done, Zendesk appears in your connected integrations list.